

Windowsill gardening proves that even the smallest spaces can produce abundance. A sunny window can become your kitchen garden, salad bar, and herb shelf all in one. With the right light, small containers, and a little daily care, you can grow tender greens, snipping herbs, crunchy roots, and even a few compact fruiting plants—no backyard or greenhouse required. The joy of watching seedlings sprout beside your morning coffee is a reminder that fresh, flavorful food can start right on your windowsill.
Table of Contents
Where Windowsill Gardening Works (Regions and Seasons)
Windowsill gardening can be done in every USDA zone because the “season” is your indoor environment, not the weather. What changes by region is how helpful that window is in winter and how much heat you must tame in summer.
• Zones 1–4: Winter light is short and weak, so focus on fast growers like microgreens, scallions, and hardy herbs. These crops don’t need long days and will tolerate lower light.
• Zones 5–7: Winter windows support herbs and greens; summers can get hot, so pull pots back from the glass. This prevents leaves from scorching in the direct afternoon heat.
• Zones 8–10: Winter is easy; summer needs shading or sheer curtains to tame the heat because glass magnifies sun like a greenhouse.
• Zones 11–13: Light is plentiful year-round; steady watering and airflow keep plants healthy since constant warmth can lead to soft, leggy growth.
Discover Why Gardeners Recommend Our Seeds!
Light, Temperature, and Placement
Light is the single biggest factor in windowsill gardening success. Most indoor crops fail not from lack of care, but from stretching toward the light, growing thin and pale. Understanding how light moves across your home—and adjusting placement as the seasons change—will make your plants sturdier and more productive.
Light requirements by crop:
• Leafy greens and herbs thrive with about 4 to 6 hours of direct sunlight or bright, indirect light each day. They can tolerate some shade but grow slower in dim windows.
• Fruiting plants such as peppers, dwarf tomatoes, or strawberries need 6 to 8 hours or more of strong light daily to flower and set fruit properly.
• Microgreens and tender baby greens can get by with bright reflected light or filtered sun since they mature quickly.
If sunlight is limited—especially in winter or north-facing windows—plants will still grow, but more slowly. In deep winter, you can boost light with a simple clamp-on LED grow light for a few hours in the morning or evening. Even a small boost keeps seedlings compact and prevents legginess.
Window direction matters:
• South-facing windows receive the most sunlight year-round and are perfect for nearly all crops.
• East-facing windows offer gentle morning light that’s ideal for herbs and greens that prefer cooler conditions.
• West-facing windows provide stronger afternoon light—great for herbs and compact fruiting plants, though you may need to move them back from the glass on hot days.
• North-facing windows have the least direct sun but still work for microgreens, scallions, parsley, and shade-tolerant greens.
Distance from the glass:
Keep plants about 6 to 12 inches from the windowpane in winter, when sunlight is weaker and heat loss can chill leaves. In summer, pull them 12 to 24 inches back to protect from intense afternoon heat. This helps prevent sunscald and keeps roots from overheating in small pots.
Rotation and balance:
Rotate each pot or tray a quarter turn every day. Plants naturally lean toward light (a response called phototropism). Without rotation, they grow long and spindly as they stretch toward the window. Turning them daily helps produce sturdy, upright growth and even leaf color on all sides.
Temperature guidelines:
Most greens and herbs grow best between 65 and 75 degrees Fahrenheit during the day, with a gentle drop at night. Avoid setting pots directly against cold glass or near drafty windows in winter—cold roots slow growth. In summer, shield plants from hot afternoon rays with a sheer curtain or by moving them a foot or two back.
Air circulation and humidity:
Indoor air can be still, especially near sunny windows. Run a small fan on low for an hour or two each day to strengthen stems and prevent mildew. This gentle airflow also discourages tiny flying pests like fungus gnats. In very dry winter air, a shallow tray of water and pebbles beneath nearby pots adds a bit of humidity without soaking the roots.
Reflecting and maximizing light:
You can increase light naturally by placing a white or reflective surface—like poster board or aluminum foil—behind your plants. It bounces light back onto the leaves, reducing shade and helping smaller plants stay compact. Cleaning windows and gently wiping leaves every few weeks also improves light absorption and photosynthesis.
Seasonal adjustment tip:
As the sun’s angle changes throughout the year, light intensity and direction shift. Slide trays along the sill or swap window locations occasionally so each set of plants gets equal exposure. Greens grown in bright winter windows can sometimes get scorched in summer if left in the same spot.
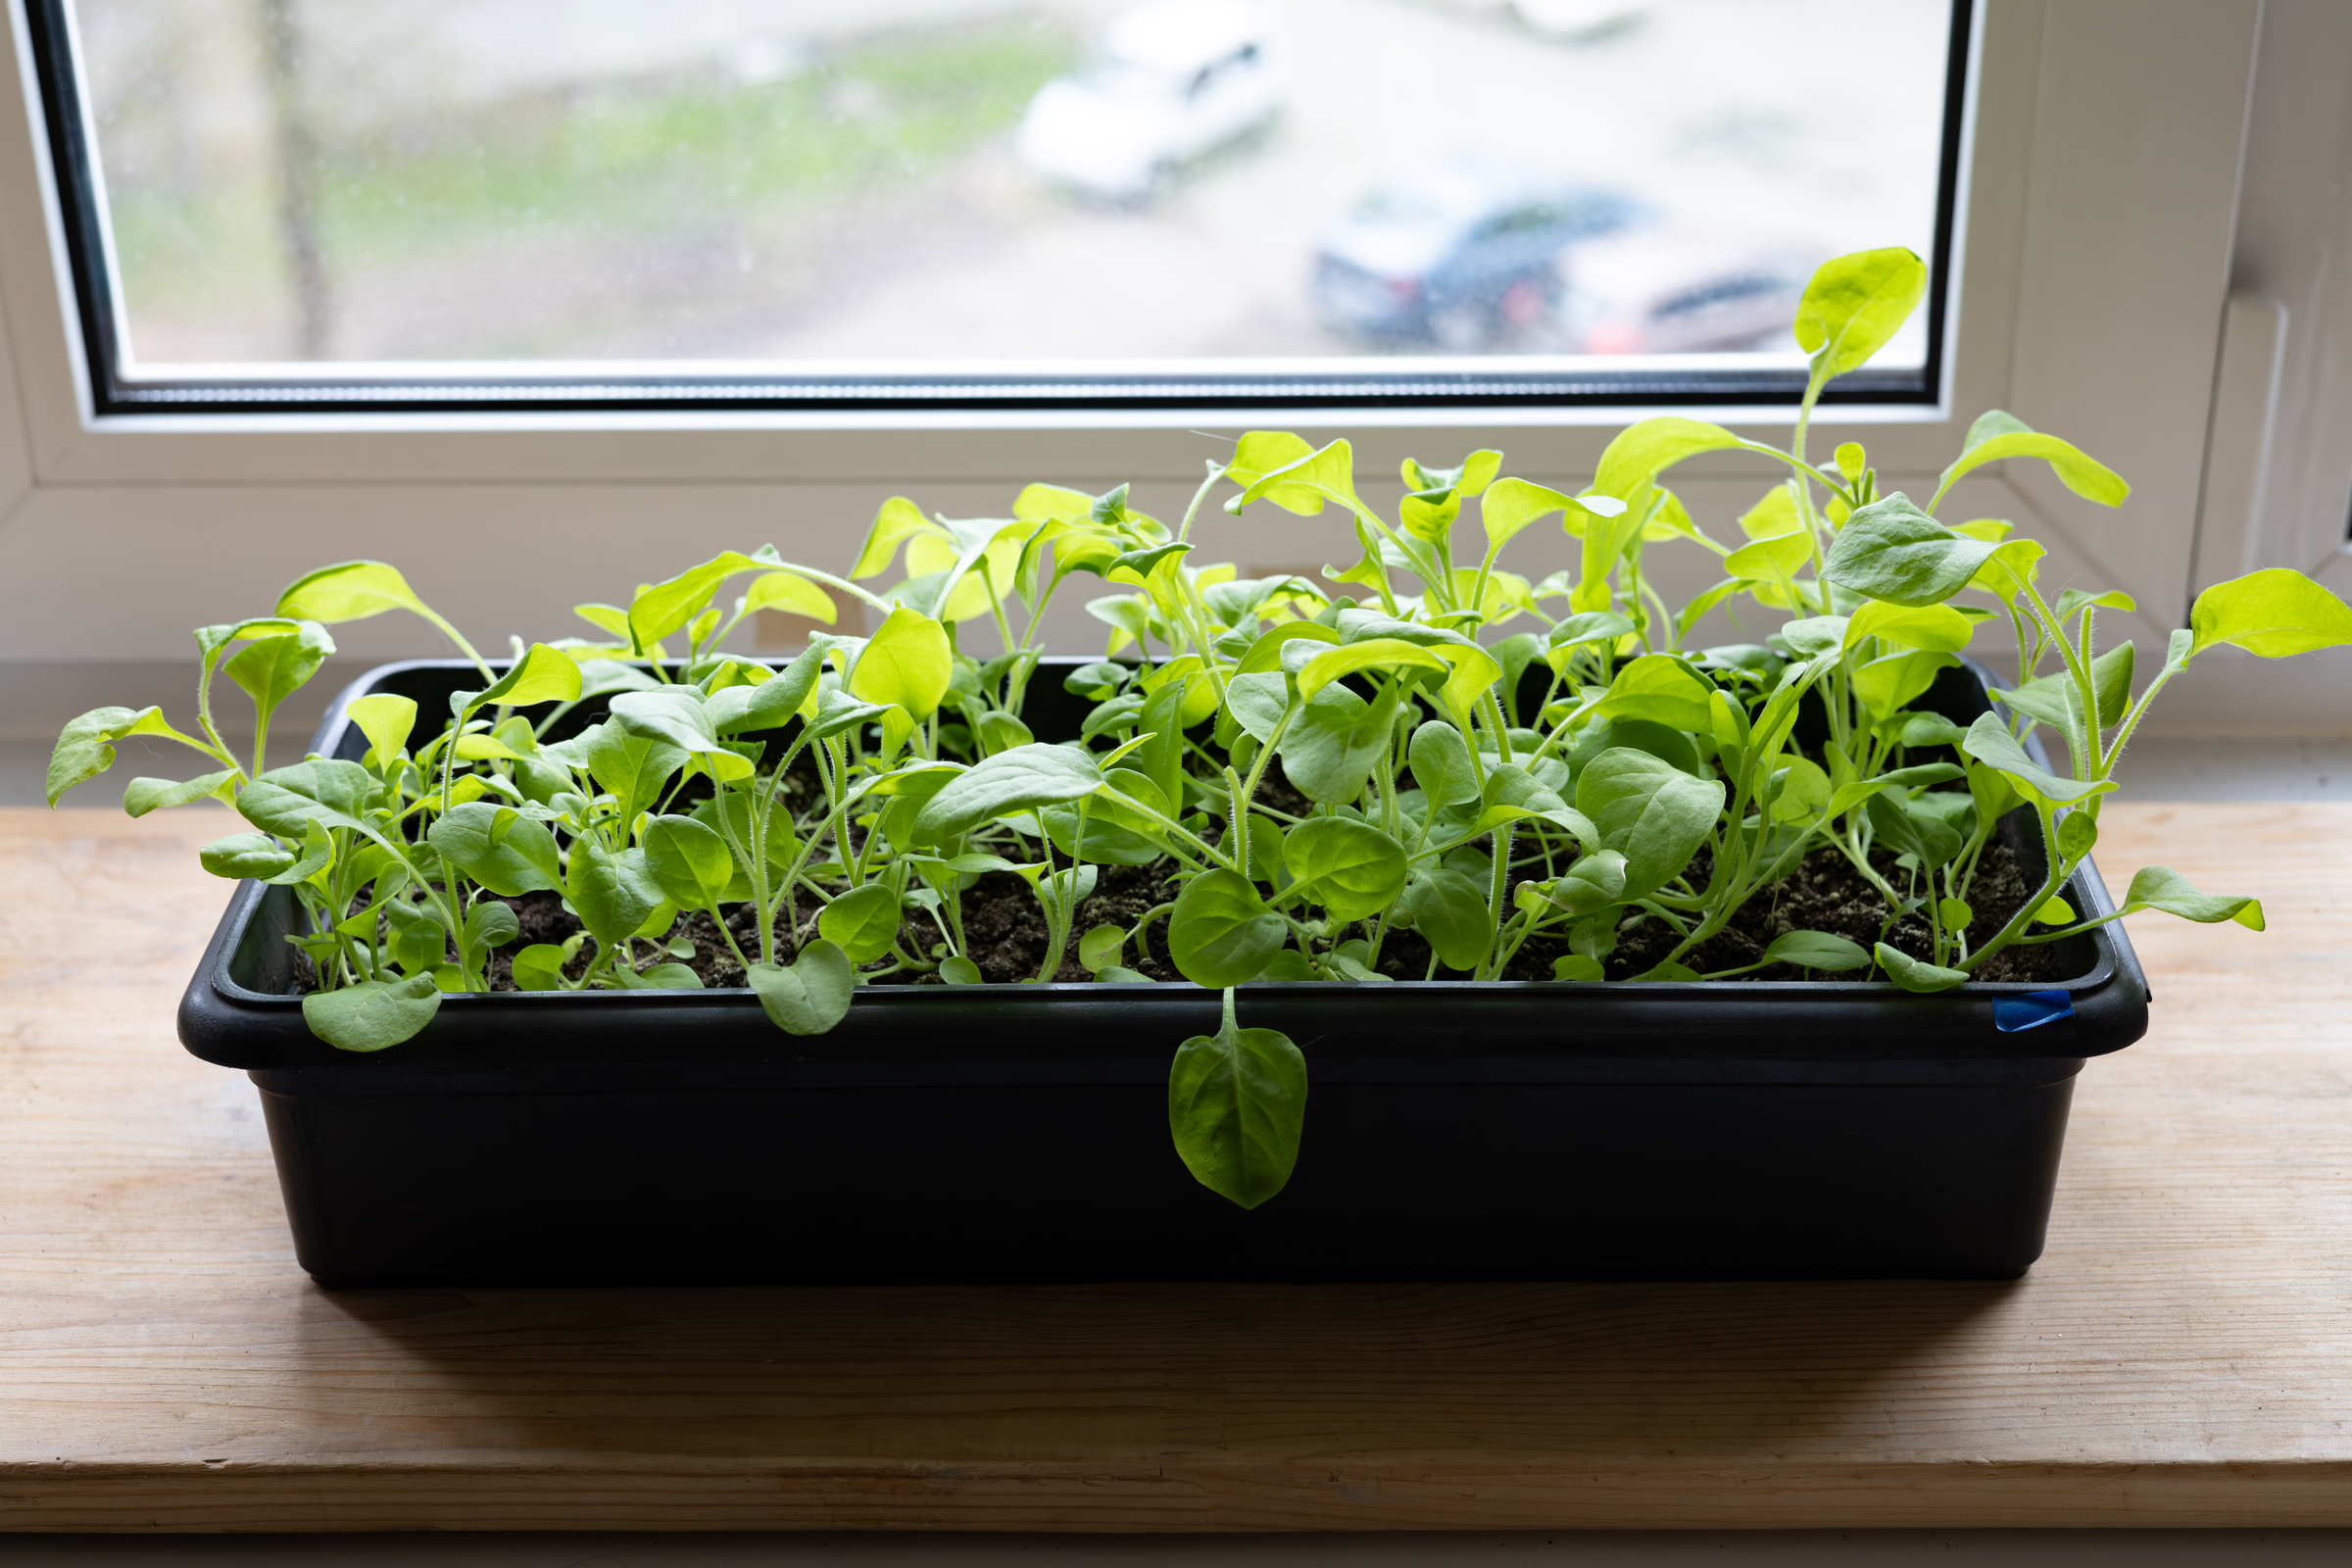
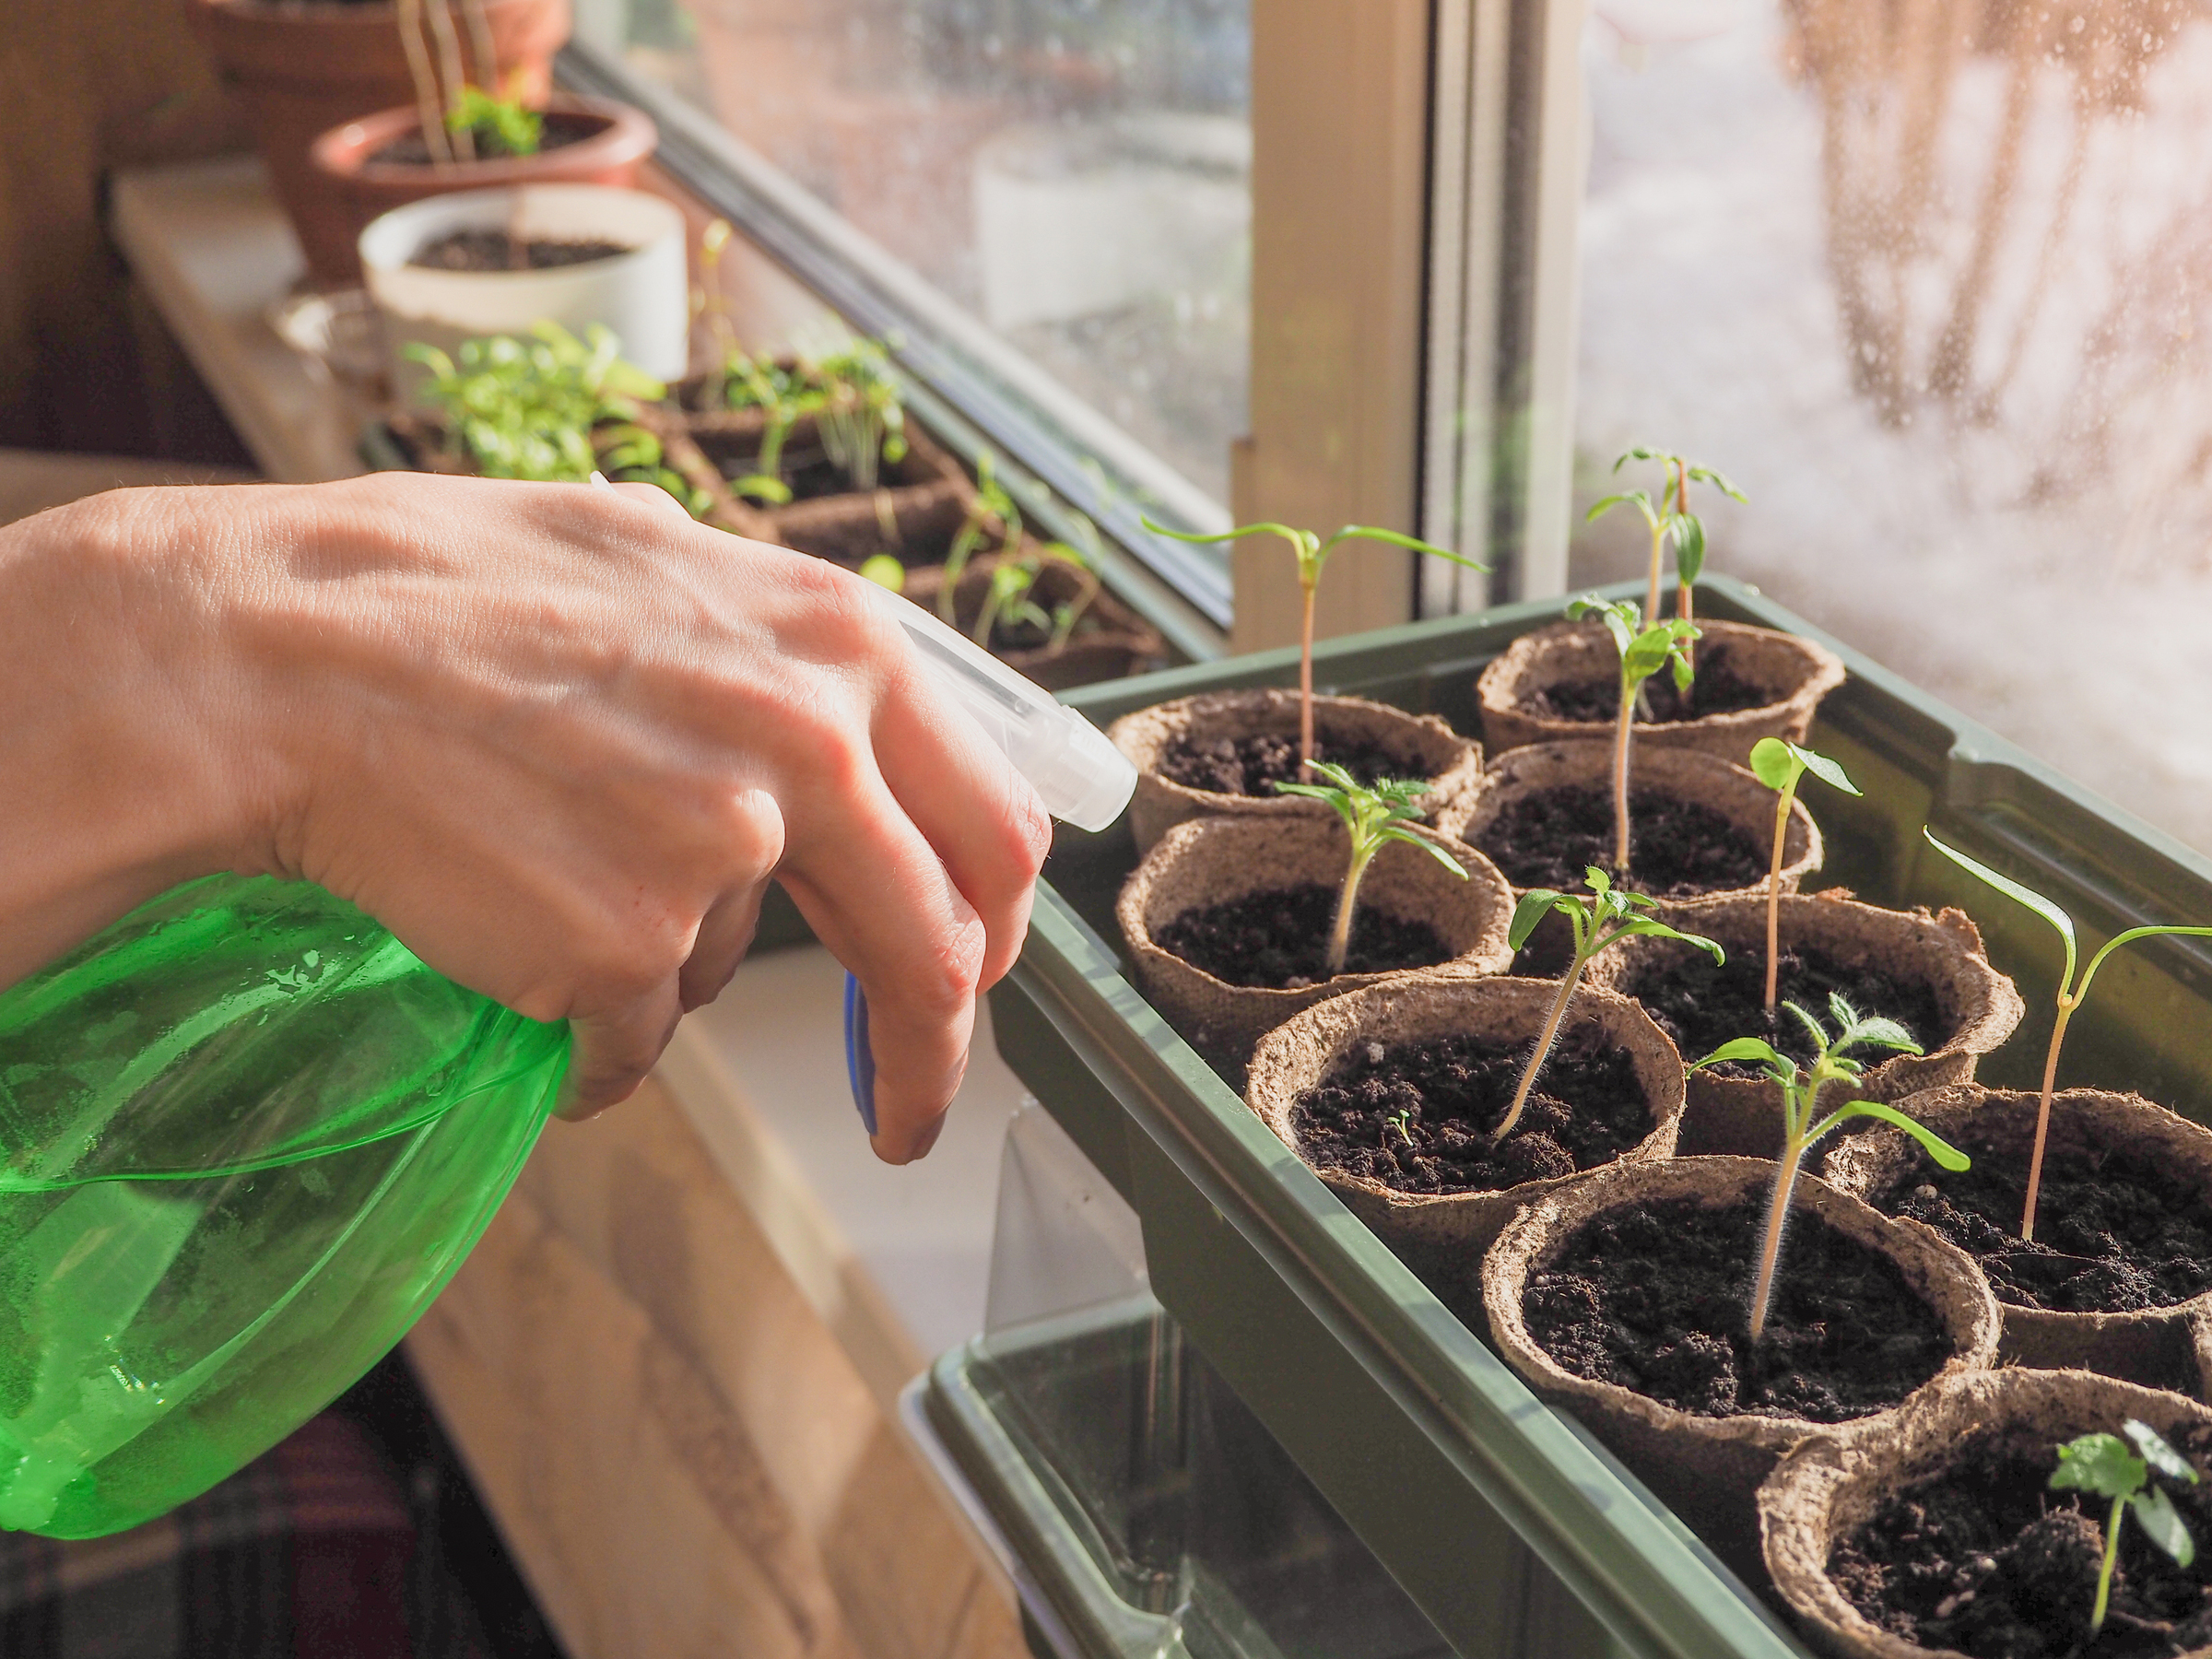
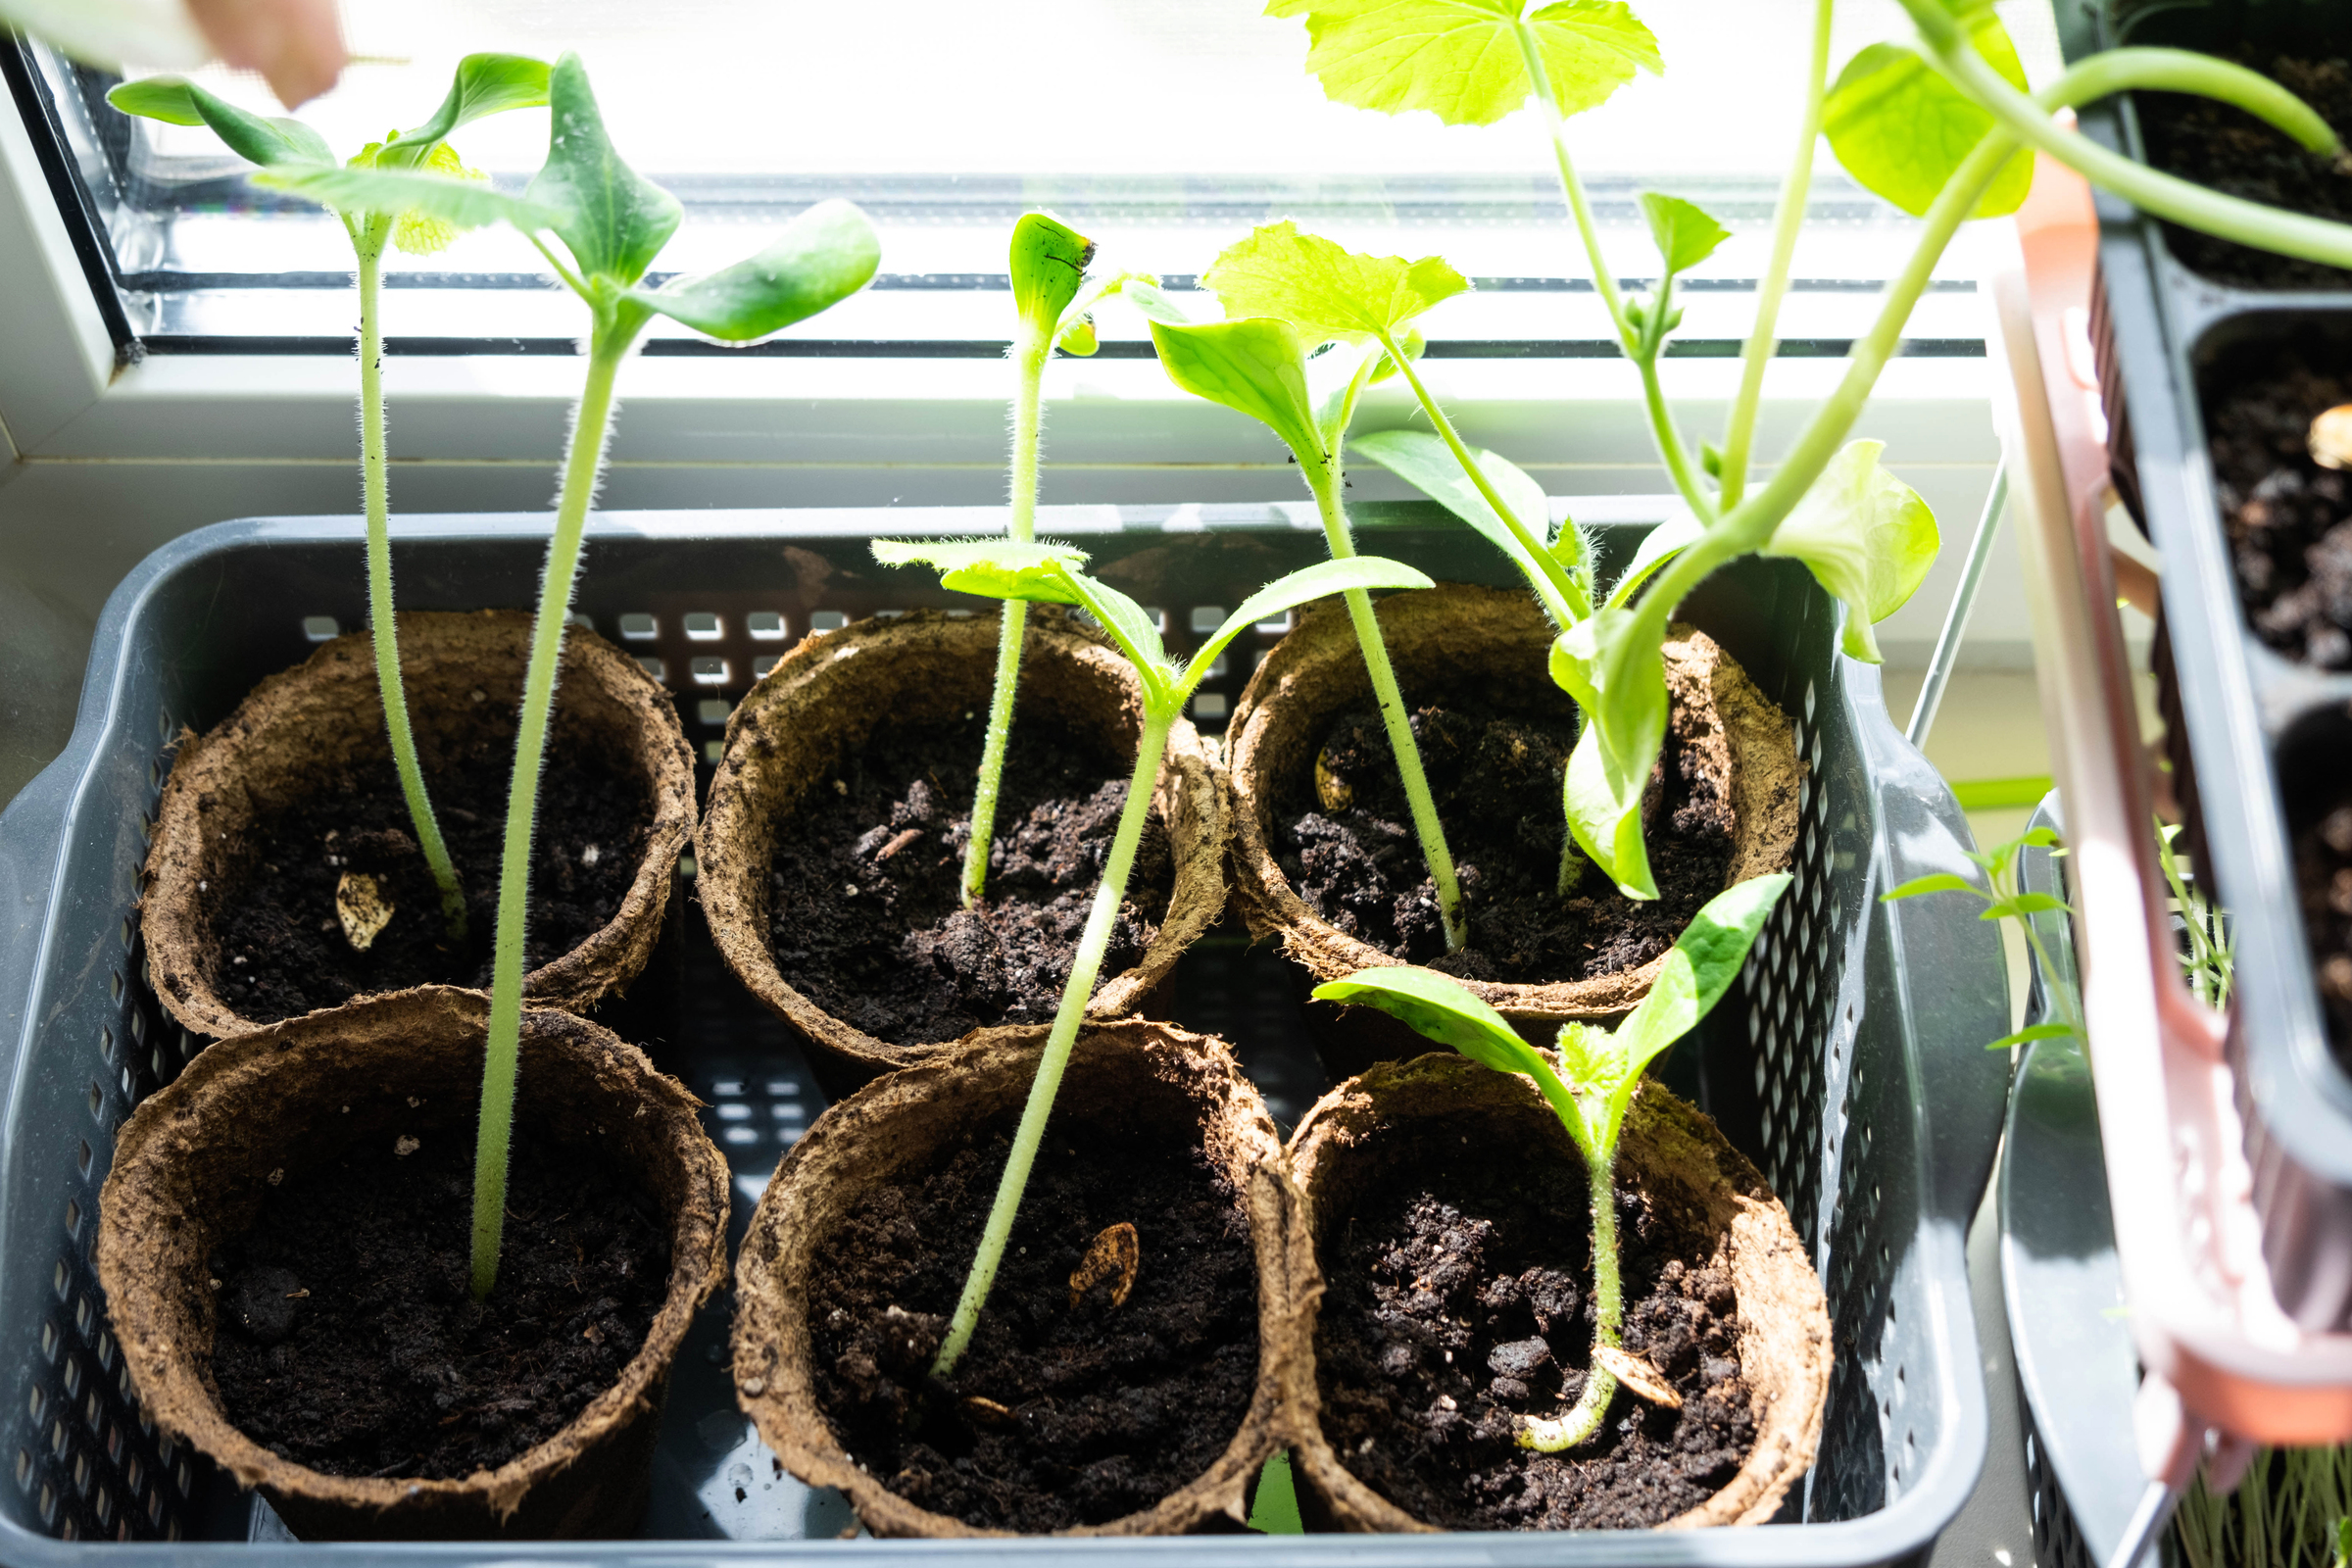
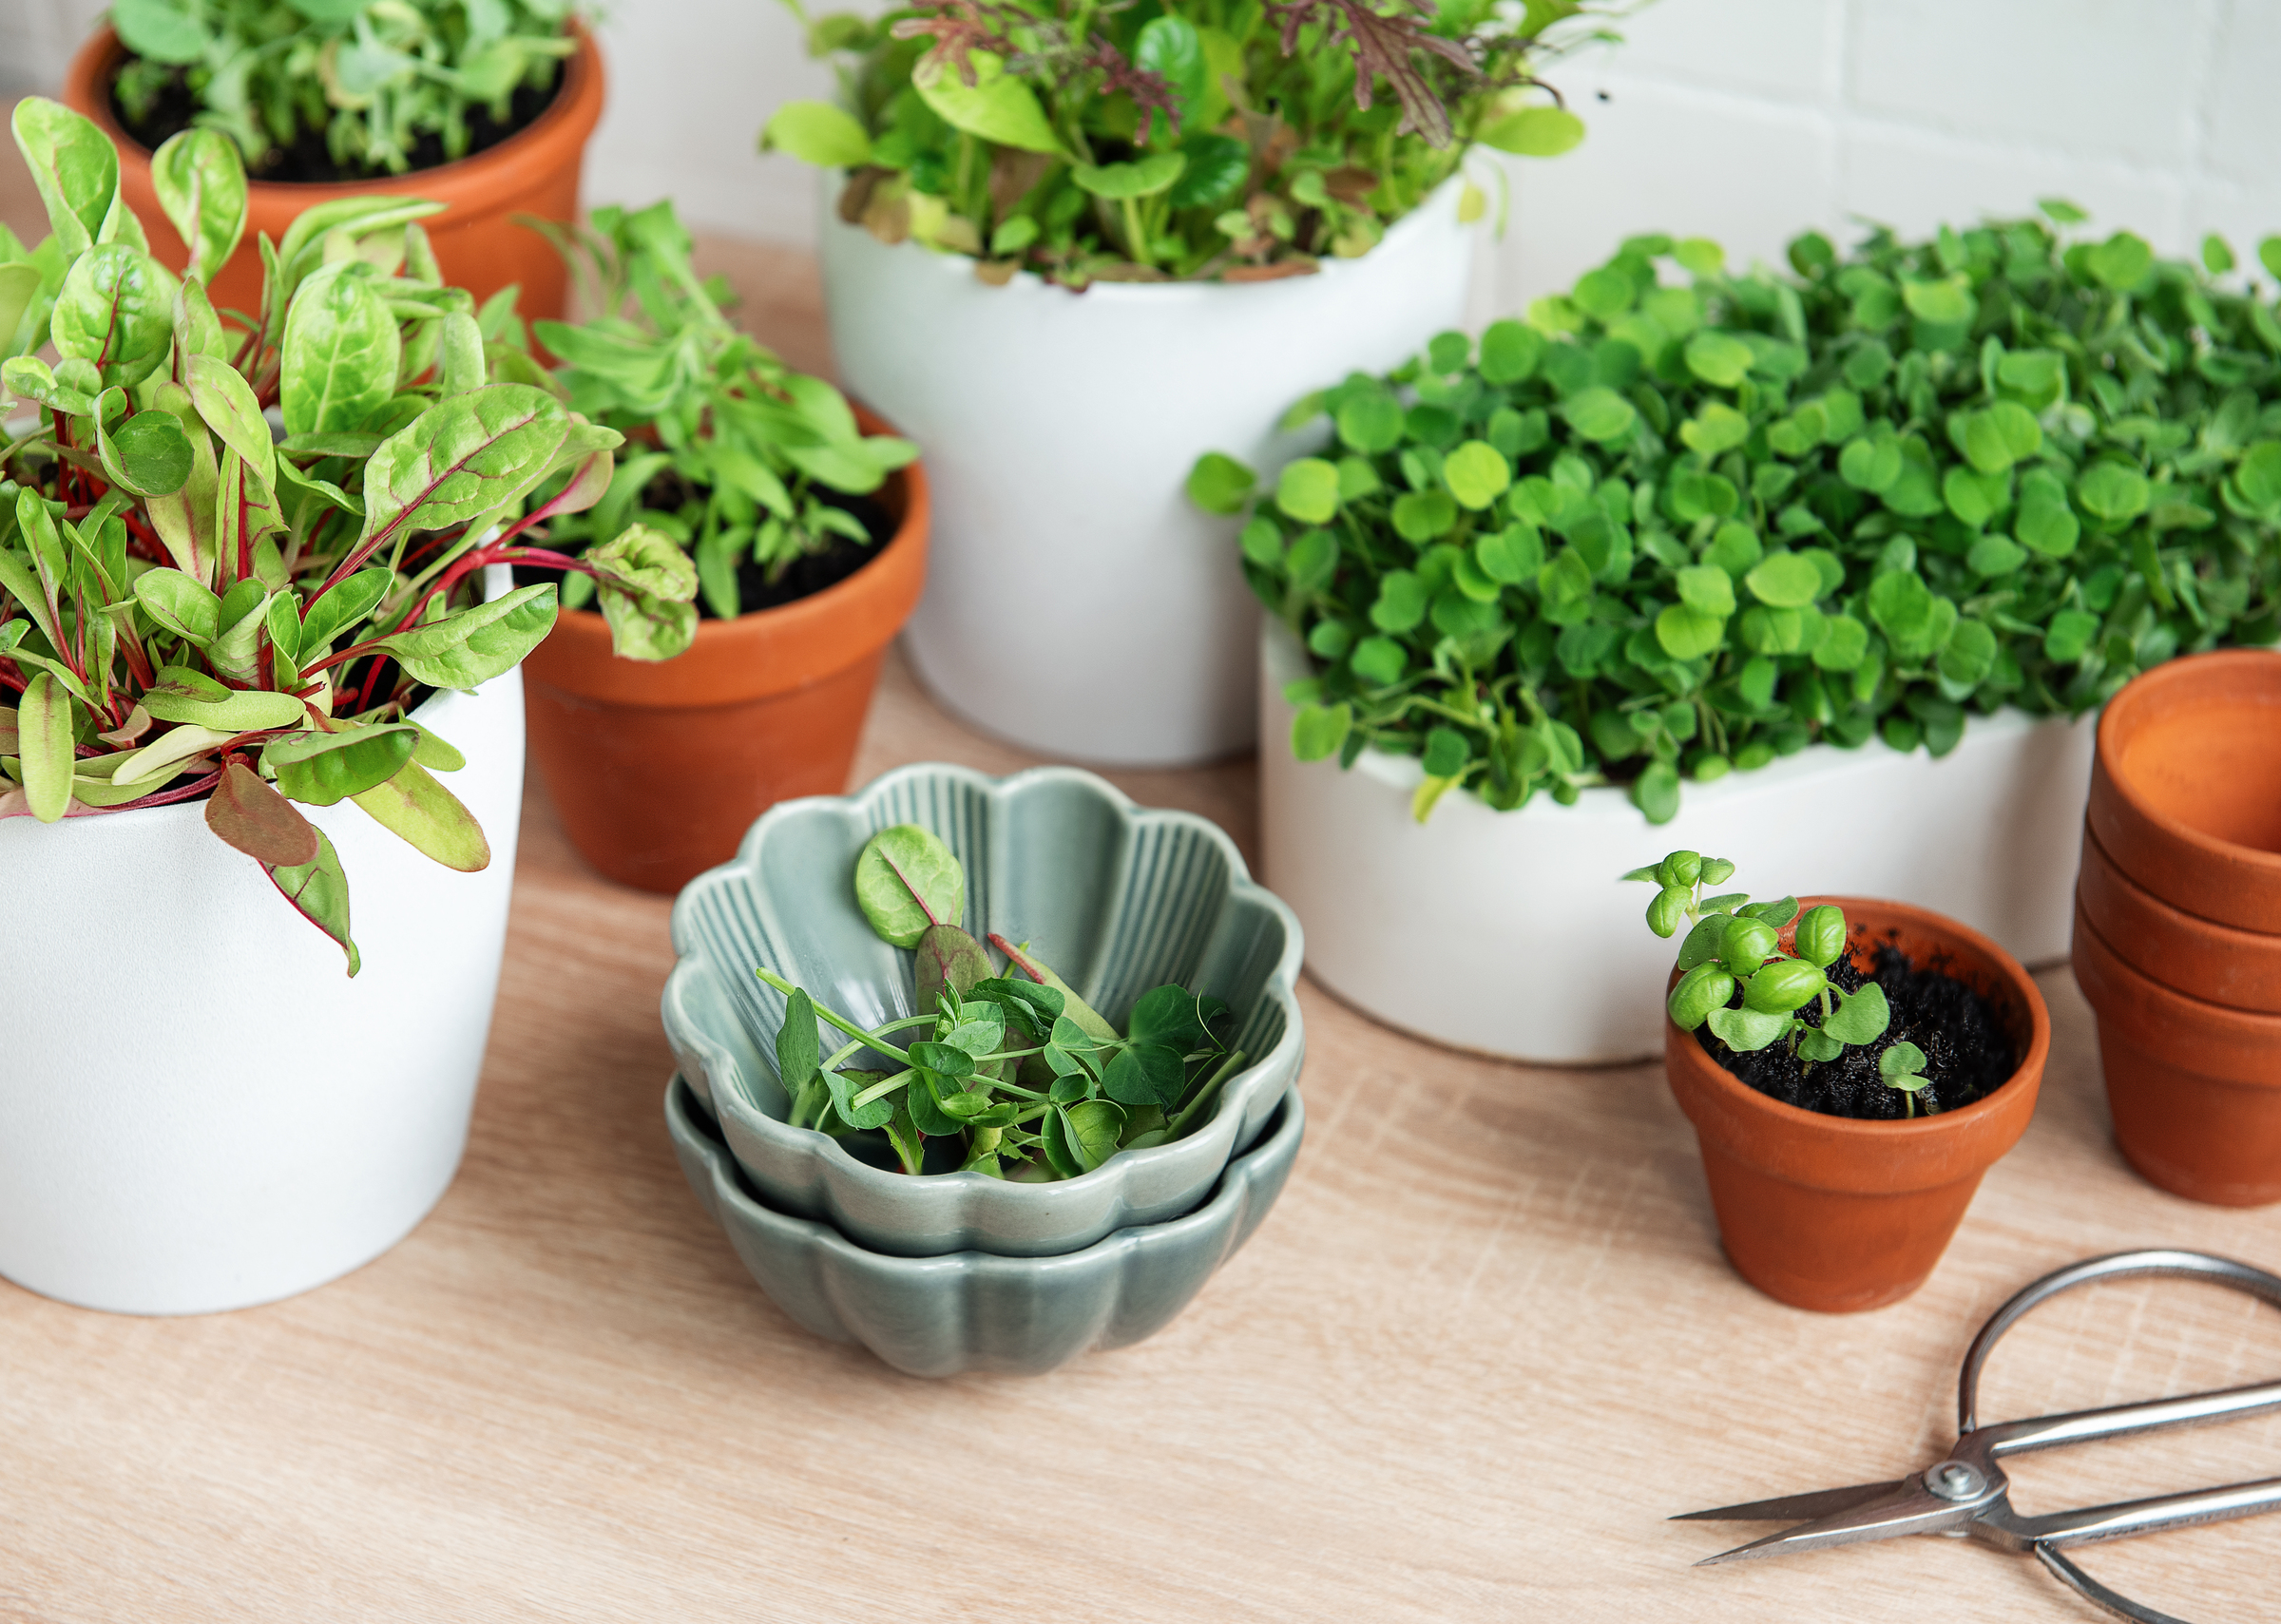
Containers, Soil, and Watering
For windowsill gardening, container depth and width depend mostly on what you’re growing. The goal is to give each plant enough room for healthy roots while keeping pots light and manageable for the sill. Here’s a general guide:
• Leafy greens and small herbs: Pots about 6 to 8 inches deep and 6 to 10 inches wide are ideal for lettuce, spinach, chives, parsley, cilantro, and basil. These shallow-rooted plants spread outward more than downward, so a wider pot supports more leaves and prevents crowding.
• Compact root crops: Choose containers 8 to 10 inches deep and at least 8 inches wide for small radishes, green onions, and baby carrots. Extra width allows air circulation and makes it easier for roots to form without twisting around each other.
• Larger herbs and deep-rooted plants: Use pots 10 to 12 inches deep and 10 to 12 inches wide or more for rosemary, sage, peppers, or dwarf tomatoes. The added depth keeps soil from drying out too quickly and gives tall plants enough weight at the base to stay upright instead of tipping toward the light.
Drainage is essential. Every container should have at least one hole in the bottom and a saucer or tray beneath to protect the windowsill from moisture. A layer of small stones or coarse perlite at the bottom can improve airflow to roots and prevent standing water.
Material matters, too.
Clay or terracotta pots “breathe,” allowing air to reach the roots and helping prevent overwatering, but they also dry faster. Plastic and glazed ceramic hold water longer—useful if you can’t check plants every day. Metal containers can work if lined properly, but they heat and cool quickly, which can stress roots near the glass.
Soil choice is just as important. Use a lightweight potting mix labeled for indoor or container growing—never garden soil. Potting mix drains well and resists compaction, which lets roots breathe. You can mix in a small handful of perlite, vermiculite, or fine coconut coir to improve both drainage and water retention.
Watering and moisture balance:
Shallow or narrow pots dry out faster because they hold less soil, so consistent watering is key. Always water thoroughly so the entire root zone is moistened, then let any excess drain. Empty saucers afterward—roots sitting in water quickly rot.
For smaller containers and tender greens, bottom-watering works beautifully: place the pots in a shallow tray of water for about 10 to 15 minutes, letting the mix absorb moisture through the drainage holes. This keeps foliage dry, helps prevent fungal problems, and gives even hydration.
Extra Tip: Check moisture by sticking your finger about an inch down—if it’s still damp, wait a day. Overwatering is a far more common issue indoors than letting plants go slightly dry. Indoor air doesn’t circulate like outdoors, so soggy soil stays wet longer and encourages fungus gnats.
As plants mature, their roots fill the container and will dry the soil more quickly. It’s normal to water larger herbs and fruiting plants daily near sunny windows. To slow evaporation, add a light mulch layer (like clean straw, dried leaves, or fine bark). It evens soil temperature and helps keep the mix consistently moist, giving windowsill crops a steadier growing environment.
Pollination and Air Movement Indoors
When gardening on a windowsill, nature’s usual helpers—bees, butterflies, and breezes—aren’t around. Indoor air stays still, and without pollinators, flowering crops can struggle to set fruit. With a few simple habits, you can easily fill in for nature and create the airflow your plants need to thrive.
Pollination basics:
Leafy greens, herbs, and microgreens are harvested before they bloom, so they don’t require pollination. But fruiting plants such as tomatoes, peppers, strawberries, and cucumbers rely on pollen being transferred between flowers to produce fruit. Outdoors, wind and insects handle that job. Indoors, you’ll need to imitate it.
• Gently shake or tap flowering stems every day or two once blossoms open. A few light taps are enough to loosen pollen and move it between flowers.
• Use a small, soft paintbrush or cotton swab to move pollen directly from flower to flower, especially with peppers and tomatoes. A light touch across the yellow center of each bloom does the trick.
• For strawberries, brush each flower carefully in a circular motion so pollen reaches all parts of the center—this helps berries form evenly without misshapen spots.
• Pollinate during the warmest part of the day, usually late morning, when flowers are most receptive.
Why it matters: Without pollination, flowers will eventually dry up and fall off without forming fruit. A few seconds of daily effort ensures consistent yields and healthier plants that put their energy into producing instead of constantly re-blooming.
Air circulation and strength:
Fresh air movement is the indoor gardener’s best substitute for a natural breeze. Gentle airflow helps stems grow thicker and prevents mold or mildew from forming in stagnant corners.
• Use a small fan on low for one to two hours a day. Aim for a soft rustle of leaves, not a strong draft. The air motion strengthens stems and helps distribute heat and humidity more evenly along the sill.
• Rotate pots regularly. Turning them daily (as mentioned earlier) ensures all sides get light and airflow, preventing one-sided, weak growth.
• Crack a window on mild days. Even a short burst of outdoor air refreshes the indoor space, flushes out excess humidity, and keeps soil surfaces drier—reducing the chance of fungus gnats and mold.
Managing humidity:
Indoor air, especially in winter, can become very dry from heating systems, while summer humidity sometimes stays too high. Both extremes affect plant health.
• In dry air, leaves may crisp at the edges or growth may slow. Place a shallow tray of water and pebbles beneath nearby pots. As water evaporates, it raises local humidity without soaking roots.
• In humid conditions, space plants a few inches apart and increase airflow with the fan or an open window to discourage fungal issues.
Temperature and pollination link:
Most indoor crops pollinate best and grow steadily between 65 and 75 degrees Fahrenheit. Below 60, pollen can become less viable, and above 85, blossoms may drop. Keeping a steady, comfortable room temperature not only benefits you—it keeps your plants blooming and fruiting reliably.
Extra Tip: When using a fan, move it around occasionally so no one spot dries faster than another. Air that’s too strong or constant can stunt young seedlings by wicking away moisture faster than roots can absorb it.
Pests and Simple Prevention
Even indoors, a few garden pests can find their way in—usually hitchhiking on new plants, potting soil, or open windows. Fortunately, most windowsill pests are easy to prevent and control once you understand what causes them. The key is keeping plants healthy, soil slightly dry between waterings, and air moving around the leaves.
Most common indoor garden pests:
• Aphids: Tiny green, yellow, or black insects that cluster on soft stems and leaf undersides. They suck sap, causing curling leaves and sticky residue. Aphids spread quickly in still air and love overfertilized, lush growth.
• Fungus gnats: Small black flies that hover near the soil surface. They lay eggs in damp potting mix, and their larvae feed on fine roots. Constantly wet soil gives them the perfect home.
• Spider mites: Microscopic specks that spin fine webs between leaves, especially on herbs like basil and thyme. They thrive in hot, dry indoor air.
• Whiteflies: Tiny white insects that flutter up when you move a plant. They weaken plants by sucking sap and spreading disease.
• Mealybugs: Cottony-looking clumps found in leaf joints or on stems. They exude a sticky “honeydew” that attracts mold.
Prevention is always easier than cure.
Most indoor pest problems begin with overwatering, stale air, or a lack of inspection. A few steady habits will prevent nearly all infestations before they start.
• Check plants regularly. Look under leaves and along stems once a week. Early detection means you can rinse or pinch off affected spots before pests spread.
• Avoid overwatering. Damp, stagnant soil is an open invitation to fungus gnats and root problems. Let the top half inch of soil dry before watering again, or use bottom-watering for better control.
• Keep air moving. A small fan on low or an open window for a short time helps prevent mildew and discourages flying pests from settling.
• Clean up fallen leaves and debris. Dead plant material quickly molds in humid indoor conditions, harboring fungus and pests.
• Quarantine new plants. Keep any newly purchased or gifted plants apart from your windowsill garden for about a week to ensure they’re pest-free before adding them to the group.
• Use good-quality, sterile potting mix. Reusing old soil can introduce gnats or disease—fresh mix greatly reduces risk.
Gentle control methods if pests appear:
• Rinse plants thoroughly in a sink or shower with a soft spray of lukewarm water. This removes most aphids, mites, and whiteflies without chemicals.
• Wipe leaves with a mild soapy water solution (one teaspoon of dish soap per quart of water). Test on a small area first to ensure leaves aren’t sensitive.
• Yellow sticky cards placed near the soil surface trap adult fungus gnats and whiteflies before they can reproduce.
• Isolate affected plants until pests are under control. Keeping one pot infested can quickly spread trouble to the rest of your windowsill.
Why these steps matter:
Indoor gardens are closed systems—no rain to wash pests away, no predatory insects to balance populations, and limited airflow. Because of this, problems that start small can multiply fast. By keeping conditions slightly drier, leaves clean, and air circulating, you break the pest life cycle before it has a chance to get established.
Extra Tip: Keep your watering can and tools clean. A quick rinse every week or two prevents mold spores and pests from transferring between containers. Also, avoid misting plants too often; while it may seem helpful, excessive humidity encourages mildew and gnats more than it benefits growth.
What You Can Start From Seed on a Windowsill Garden

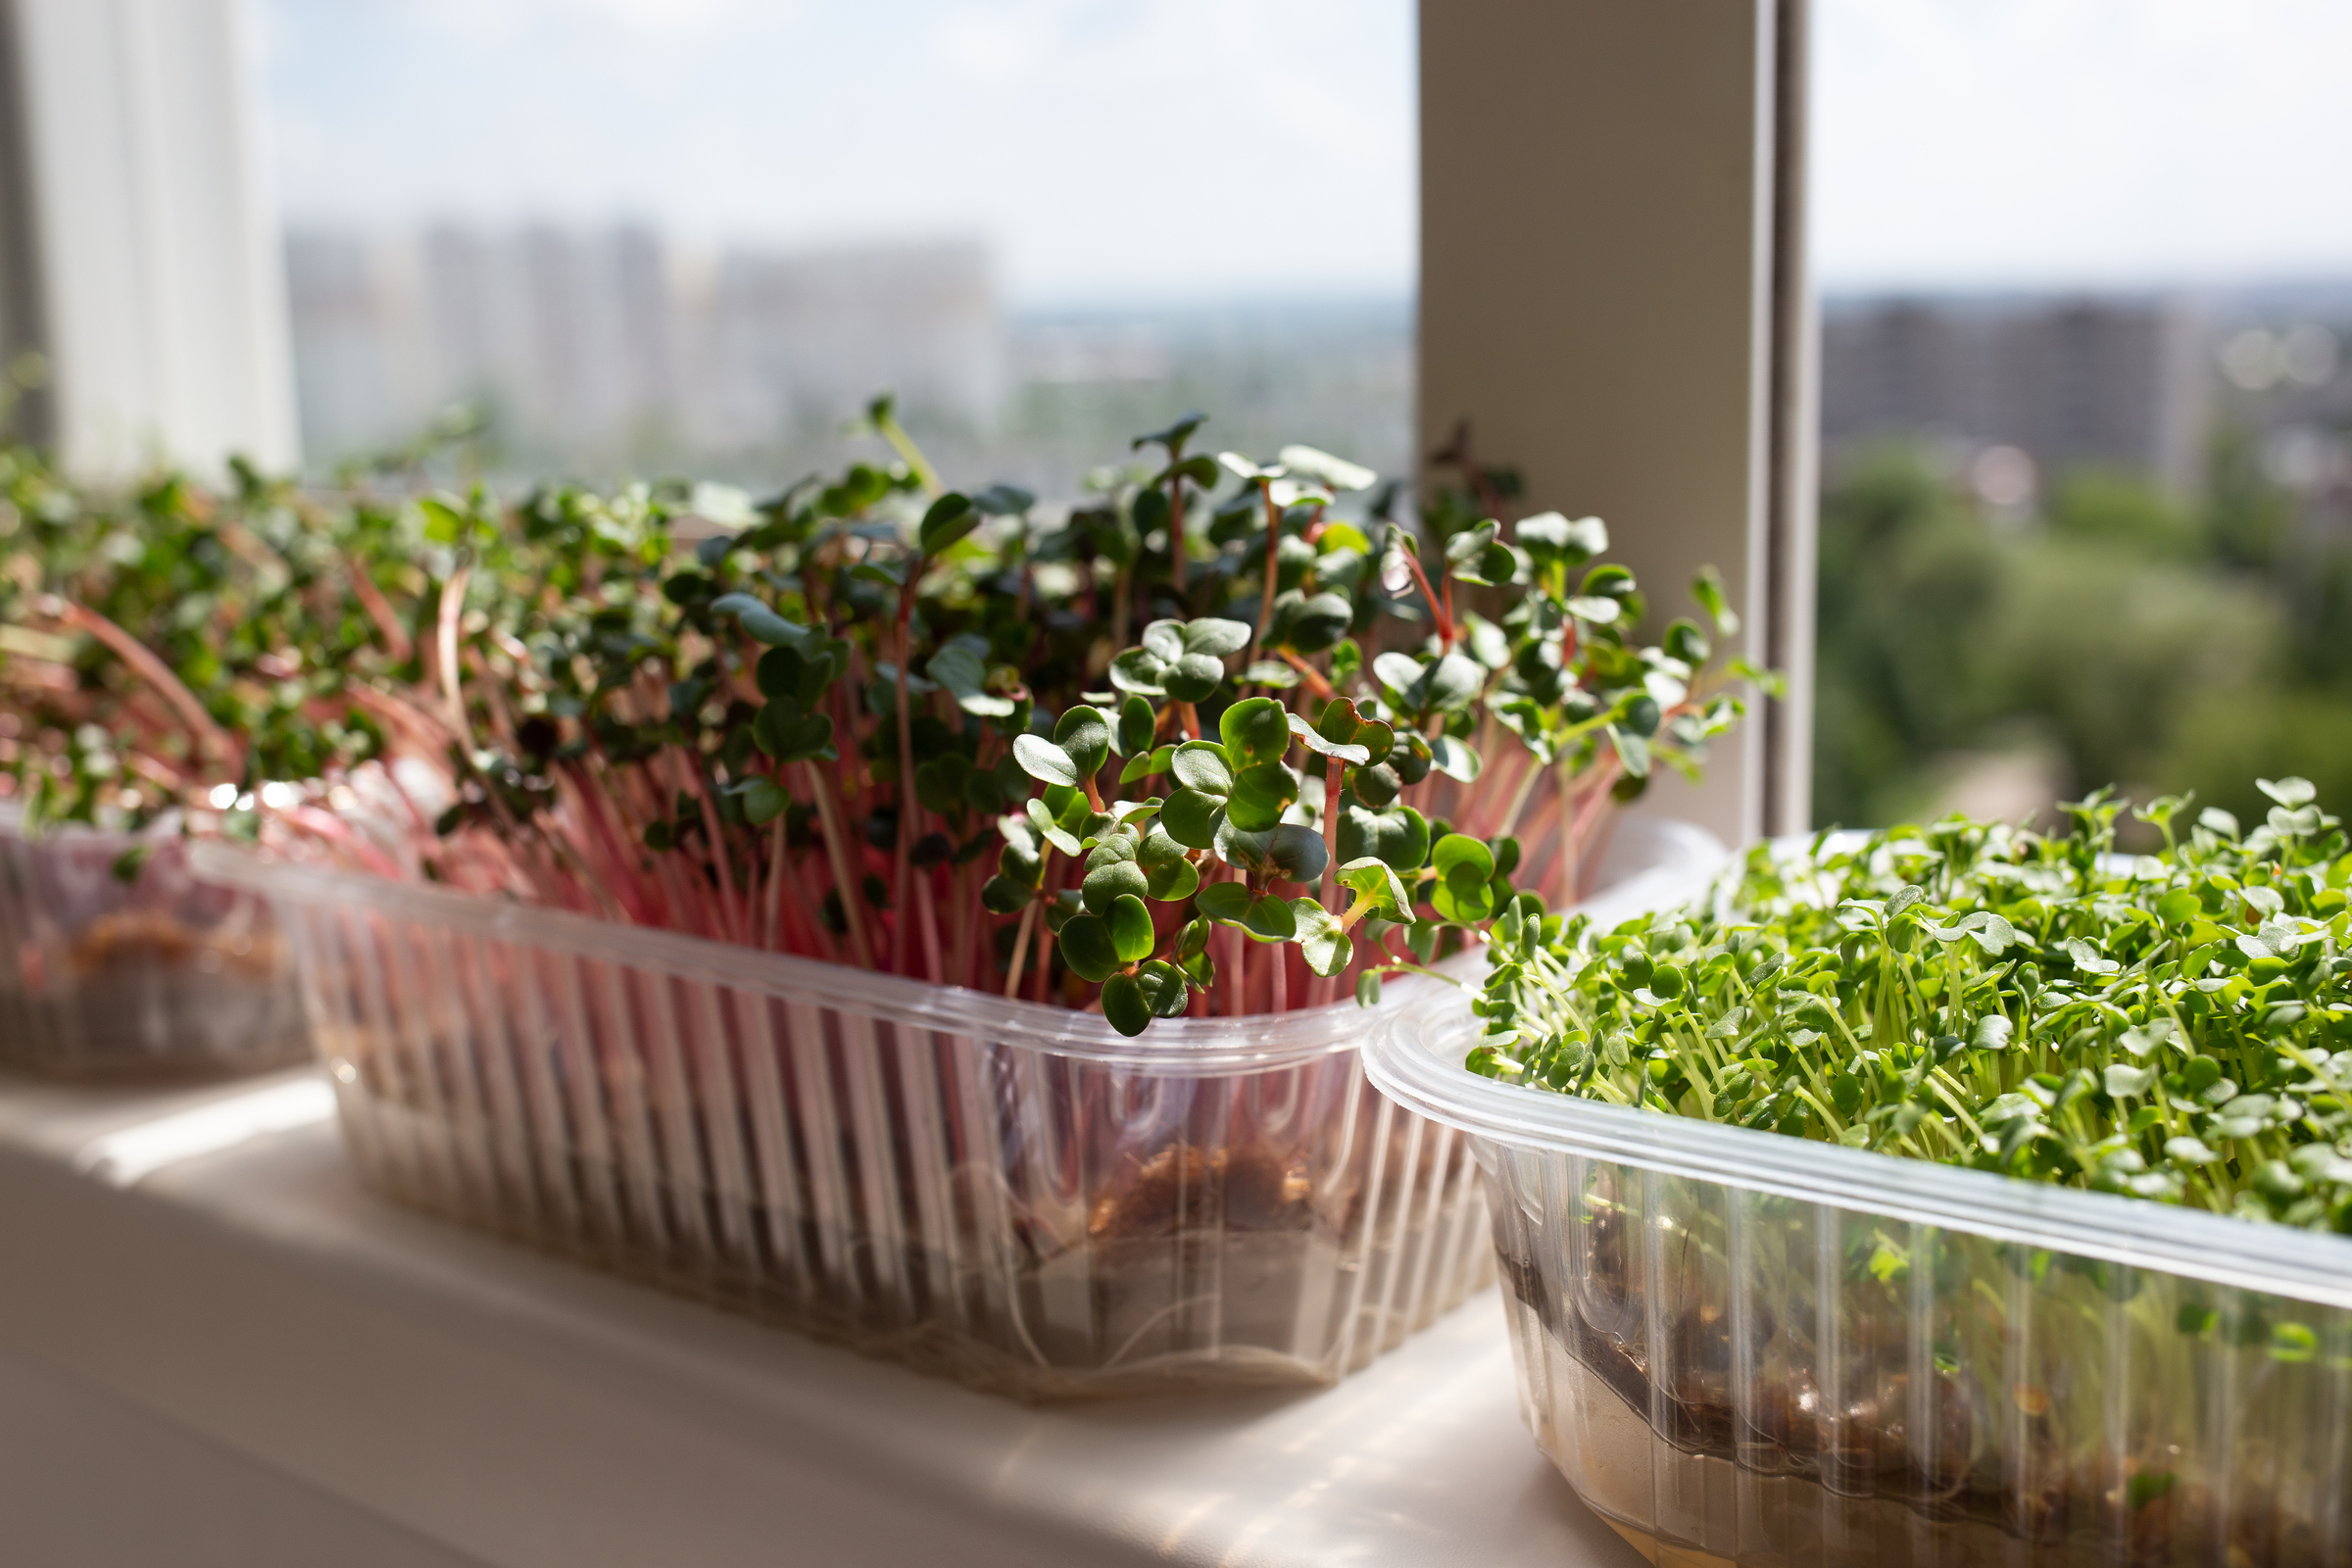
• Microgreens: radish, broccoli, kale, peas, sunflower, mustard—ready in 7–21 days. These are quick, need little space, and give maximum nutrition in minimum time.
• Baby greens: lettuce mixes, spinach, arugula, Asian greens—cut-and-come-again in 3–5 weeks. Harvesting outer leaves keeps the plant producing longer.
• Herbs: basil, parsley, cilantro, dill, thyme, oregano, chives—steady harvests with pinching. Regular trimming prevents herbs from bolting too soon.
• Alliums: scallions, baby leeks, garlic chives—harvest as pencil-thin stalks. These thrive in close quarters and regrow from cut bases.
• Roots: radishes, short baby carrots, baby turnips, kohlrabi—bright windows only. Root crops need strong light to fill out properly.
• Shoots: pea and fava tops—cut young for tender greens. Harvesting young ensures sweet, tender flavor.
• Fruiting crops: tiny tomatoes, compact peppers, dwarf cucumbers, alpine strawberries—best in south-facing windows with 6–8 hours of sun. Fruiting plants need consistent warmth and feeding for success indoors.
• Specialty greens: mâche, claytonia, sorrel, nasturtiums for leaves and blossoms. These add unusual flavors and thrive in cool, steady indoor conditions.
Handy Daily and Weekly Habits
• Turn each pot or tray daily so stems grow upright and even, instead of spindly from leaning toward the window.
• Harvest often—snipping herbs and greens encourages fresh growth rather than letting them get woody or bitter.
• Wipe windows and plant leaves every so often to remove dust and let light through. Dust can block a surprising amount of light.
• Keep a small notebook by the sill to track sowing dates and harvests—you’ll learn what thrives in your own conditions.
• Sow in small batches weekly or biweekly for steady, non-stop harvests instead of one big glut.
Extra Tip: Group plants with similar needs together (basil with parsley, lettuce with spinach) so watering and feeding are easier to manage. Mixing dry-loving herbs with water-hungry greens often leads to frustration.
Common Problems and Quick Fixes in Windowsill Gardening
• Leggy, leaning plants: Not enough light, or plants aren’t being turned daily. They stretch trying to reach the brightest spot. Move closer to the window, rotate pots each day, or use reflectors.
• Slow growth in winter: Caused by short days and cool temperatures. Favor microgreens and scallions until light levels improve.
• Yellowing leaves: Often from hunger (needs fertilizer) or overwatering (roots can’t breathe). Feed lightly and let soil dry a little between waterings.
• Bitter greens: Heat or drought stress makes leaves taste sharp. Pull pots back from hot glass and water consistently.
• Fungus gnats: Caused by soil staying too wet. Let the top layer dry, water from below, and use sticky traps.
• Drooping leaves: Usually underwatering, but can also mean roots are waterlogged. Check the soil before adding more water.
• Herbs bolting (flowering early): Usually from heat or inconsistent harvesting. Pinch tips often and keep in moderate temperatures.
Seasonal Planting Calendar for Windowsills
Since windowsill gardening works indoors, the “seasons” depend more on light levels than frost. Here’s a guide by season and zone:
Winter (short days, weaker sun)
• Zones 1–4: microgreens, scallions, parsley, cilantro, mâche, claytonia, spinach, baby lettuce.
• Zones 5–7: same as above, plus basil and dill in bright south windows.
• Zones 8–13: nearly all greens and herbs; even compact tomatoes or peppers can succeed with enough light.
Spring (increasing daylight)
• All zones: microgreens, salad mixes, radishes, herbs, scallions, baby carrots, baby turnips.
• Zones 5–13: start compact tomatoes, peppers, or alpine strawberries indoors for early harvests.
Summer (bright light, potential heat stress)
• Zones 1–4: ideal for all crops, since long days bring the best light.
• Zones 5–7: greens and herbs thrive; fruiting plants succeed if kept back from hot glass.
• Zones 8–13: focus on heat-tolerant herbs (basil, oregano, thyme); microgreens may grow faster but can get spicier in heat.
Fall (light wanes, temperatures steady indoors)
• All zones: return to cool-season greens (spinach, lettuce mixes, arugula), scallions, cilantro, parsley, and microgreens.
• Zones 7–13: can continue herbs and even a late crop of compact peppers or tomatoes if light remains strong.
Conclusion: Growing Success with Windowsill Gardening
Windowsill gardening offers a simple and rewarding way to keep fresh life growing indoors all year long. With just a few containers, a sunny ledge, and regular care, anyone can enjoy the satisfaction of harvesting herbs, greens, or even small fruits right from home. Whether you live in an apartment or a house, this method makes gardening accessible to every season and every space. As you learn to balance light, watering, and rotation, your little indoor garden will thrive—bringing color, flavor, and joy to your daily routine.
What are your thoughts? Drop a comment below!
FAQ:
What is windowsill gardening?
Windowsill gardening is the practice of growing vegetables, herbs, and even small fruits indoors on a sunny windowsill. With good light and simple care, you can enjoy fresh, homegrown produce year-round, no matter your climate or garden space.
Can windowsill gardening be done in any region or USDA zone?
Yes. Windowsill gardening works in every USDA zone because your growing “season” depends on indoor light and temperature. Even in northern zones, you can grow microgreens, scallions, and hardy herbs through the winter.
What are the best plants for windowsill gardening?
The best choices for windowsill gardening include microgreens, lettuce mixes, spinach, parsley, basil, cilantro, dill, scallions, radishes, and even compact tomatoes or peppers in bright windows. Choose plants suited to your available light and container size.
How much sunlight is needed for successful windowsill gardening?
Most windowsill gardening setups need 4–6 hours of direct sunlight daily for leafy greens and herbs, and 6–8 hours for fruiting crops like tomatoes and peppers. South-facing windows are ideal, but east or west windows can also work with reflective surfaces or grow lights.
What type of containers and soil work best for windowsill gardening?
Use small pots or trays with drainage holes—4–6 inches wide for greens and herbs, 8–10 inches for fruiting plants. A lightweight potting mix designed for indoor use ensures good drainage and healthy root growth for windowsill gardening.
How often should I water plants in a windowsill garden?
In windowsill gardening, water when the top half inch of soil feels dry. Avoid overwatering—soggy soil can cause root rot and attract fungus gnats. Bottom watering is a simple and effective method to keep roots evenly moist.
How do I pollinate indoor plants when windowsill gardening?
For fruiting plants in windowsill gardening, gently tap stems or use a small brush to transfer pollen between flowers. Since bees aren’t active indoors, this hand pollination helps ensure tomatoes, peppers, and other crops set fruit.
What pests should I watch for in windowsill gardening?
Common pests in windowsill gardening include aphids, spider mites, and fungus gnats. Inspect plants weekly, rinse leaves if needed, and use yellow sticky traps to catch gnats. Proper watering and airflow prevent most indoor pest problems.
Why are my windowsill gardening plants getting leggy or yellow?
Leggy growth means the plants aren’t getting enough light—move them closer to the window or rotate pots daily. Yellow leaves often indicate overwatering or lack of nutrients. Adjust watering habits and feed occasionally with a mild fertilizer.
What can I grow in each season with windowsill gardening?
Windowsill gardening allows year-round growing: cool-weather crops like microgreens and spinach in winter, salad mixes and herbs in spring, compact fruiting plants in summer, and leafy greens again in fall. Adjust plant choices based on daylight and temperature indoors.


Can windowsill containers be watered using a wicking method?
+
J.M.J.
Dear Betsy,
We apologize for the late reply! Yes, absolutely — windowsill containers can be watered using a wicking method, and it’s actually one of the most reliable ways to keep plants evenly moist without overwatering. Here’s how it works and what to consider:
How It Works
A wicking system uses capillary action to draw water upward from a reservoir into the soil. You can set it up in two main ways:
String or Rope Wick: Place a cotton or nylon cord between the container’s drainage hole and a small water reservoir below (like a shallow tray or jar). The wick will slowly pull water up into the soil as it dries out.
Double-Pot Setup: Set your plant container (with drainage holes) inside a slightly larger container that holds water at the bottom. A strip of fabric or felt runs from the water up into the soil.
Advantages
Keeps moisture consistent — great for herbs and small vegetables.
Reduces the need for daily watering, especially in warm indoor conditions.
Prevents soggy soil and root rot compared to bottom watering alone.
Things to Watch
The wick must stay in contact with both the water and the soil.
Don’t use synthetic potting mixes that repel water; choose one with peat or coco coir for better wicking.
Periodically flush the soil from the top to prevent salt buildup from fertilizers.
How deep should windowsill containers be?
+
J.M.J.
HI MK,
Thank you for that great question! For windowsill gardening, container depth depends mostly on what you’re growing, but here’s a general guide:
• Leafy greens and herbs: Need the least depth—6 to 8 inches is usually enough for things like lettuce, spinach, basil, chives, parsley, and cilantro.
• Compact root crops: For small radishes, green onions, and baby carrots, aim for 8 to 10 inches.
• Larger herbs or deeper-rooted plants: For rosemary, sage, peppers, or dwarf tomatoes, use 10 to 12 inches or more if your windowsill can support it.
Make sure the containers have good drainage holes and a tray or such underneath to protect the sill. Also, shallow pots dry out faster, so consistent watering and quality potting mix are key.
God bless,
John, Sarah, and Family
+
J.M.J.
Dear M.Maley,
Thank you for your question, and we apologize for this late reply:
For windowsill gardening, container depth depends mostly on what you’re growing, but here’s a reliable guide:
Leafy greens and herbs: Need the least depth—6 to 8 inches is usually enough for things like lettuce, spinach, basil, chives, parsley, and cilantro.
Compact root crops: For small radishes, green onions, and baby carrots, aim for 8 to 10 inches.
Larger herbs or deeper-rooted plants: For rosemary, sage, peppers, or dwarf tomatoes, use 10 to 12 inches or more if your windowsill can support it.
Make sure the containers have good drainage holes and a saucer underneath to protect the sill. Also, shallow pots dry out faster, so consistent watering and quality potting mix are key. This is a generalization, but should help with ideas of good container size. Hope this helps!
God bless,
John, Sarah, and Family.