
If you have leftover vegetable seeds or plan to save seeds from your heirloom open-pollinated plants this season, learning the basics of proper seed storage is essential. Whether you’re setting aside purchased seed packets or collecting your own, storing your seeds the right way helps preserve their viability and ensures strong germination when it’s time to plant. Good seed storage isn’t complicated, but it does take a little planning to get the best results year after year.
Table of Contents
10 Tips for Heirloom Seed Storage
Find Out What Makes Our Seeds Stand Out—Real Reviews
1. Importance of Dry, Cool Storage
Seeds need to be kept dry and cool no matter where you’re storing your seeds. Excess moisture and high temperatures are the biggest enemies of long-term seed storage, as they can drastically shorten the shelf life and reduce germination rates. Even a few days in a warm, humid environment can begin to break down a seed’s internal structure, especially for more delicate varieties. Whether you’re saving heirloom seeds from your garden or preserving leftover seed packets, maintaining a dry, cool environment is the foundation of successful seed storage.

2. Ideal Storage Location
For most home gardeners, the refrigerator is generally the best place for reliable long-term seed storage. It offers consistent cool temperatures and low humidity—two of the most important factors when storing your seeds to maintain viability. If refrigerator space is limited, consider using another cool, dark area in your home such as a basement, root cellar, or an interior closet away from heat sources. Avoid places like garages, attics, or sheds, where temperatures and humidity can fluctuate. Wherever you choose, remember: successful seed storage starts with a cool, stable environment.
3. Recommended Storage Containers
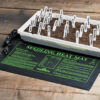
Choosing the right containers is a key part of effective seed storage. Options like plastic food storage bags, plastic film canisters, mason jars with tight-fitting lids, or glass canisters with gasketed seals work well to protect seeds from moisture and air exposure. Grouping smaller seed packets inside a larger sealed container can provide extra protection. Just be sure everything is clean, completely dry, and sealed tightly to keep your seeds in good condition for the long haul.
4. Testing Seed Dryness
You can check your larger open-pollinated or heirloom vegetable seeds to see if they’re dry enough for seed storage by giving a couple a quick test—gently smash them with a hammer on a hard surface. If the seeds shatter cleanly rather than bend or mash, that’s a good sign they’ve dried out completely and are ready to be stored. If they’re still soft or dent instead of cracking, give them more time to dry. This simple test helps ensure your seeds won’t mold or spoil in storage.

5. Keeping Seeds Dry
To help keep seeds dry during seed storage, wrap about two heaping tablespoons of powdered milk in four layers of facial tissue and tuck the packet inside the container along with your seed envelopes. Powdered milk acts as a simple homemade desiccant, absorbing excess moisture. You can also use a packet of silica gel if you have one on hand. Do not use oxygen absorbers or vacuum sealing your seeds—while it might seem helpful, seeds actually need a bit of oxygen to stay viable over time.
6. Organizing Seeds by Year
Store each year’s open-pollinated or heirloom vegetable seeds together and clearly mark them with the date. This simple habit makes it easy to keep track of seed age and helps you stay organized for future planting. Most seeds remain viable for about three years, depending on the variety and how well they’ve been handled. By labeling your containers and grouping them by year, you’ll know at a glance which ones are likely still good and which might need replacing—an easy way to keep your seed storage system running smoothly.
7. Preparing Seeds for Planting
When you’re ready to plant, take your seed containers out of the refrigerator but don’t open them right away. Let them sit closed until the seeds warm up to room temperature. If you open them too soon, moisture from the air can condense on the cold seeds, causing them to clump together or even start to spoil. This extra step might seem small, but it helps protect your seeds and keeps your seed storage efforts from going to waste.
8. Saving Your Own Seeds
If you’re gathering and saving seeds from your own open-pollinated/heirloom plants, spread the seeds on newspaper and let them air dry for about a week. Write seed names on the newspaper to avoid mix-ups. Pack the air-dried seeds in small paper packets or envelopes and label with plant name, date, and other pertinent information. Remember, only open-pollinated or heirloom varieties will come back true to type; hybrids won’t.
9. Alternative Seed Drying Method
You can also dry saved seeds on paper towels. Once dry, the seeds will stick to the towel, making them easy to handle and store. Just roll up the towel with the seeds still attached, and that becomes your storage method. When planting time comes, tear off small bits of the towel—one seed at a time—and plant seed and towel together right in the soil. It’s a simple, space-saving option for storing your seeds, especially if you’re working with smaller quantities.

10. Accepting Some Seed Loss
Even with careful planning and organized methods, it’s important to accept that not all seeds will germinate the following season. Some varieties naturally have shorter shelf lives—sweet corn and parsnip seeds, for example, often show lower germination rates after just one year. Others may only stay viable for a year or two, no matter how well you’re storing your seeds. That’s why it’s a good idea to label everything clearly and keep an eye on dates, so you’re not caught off guard when planting time rolls around.
These ten tips for storing your seeds will help you keep your seeds viable for longer!
FAQ: Heirloom Seed Storage
Why is it important to store seeds properly?
Proper seed storage is essential for keeping seeds viable over time. When stored correctly, seeds are less likely to dry out too much, absorb moisture, or experience damaging temperature swings—all of which can lower germination rates. By maintaining the right conditions, you help ensure that your seeds will sprout reliably when planting season arrives, giving you a better start in the garden.
What conditions are best for storing seeds?
Keeping seeds dry and cool is one of the most important steps in storing your seeds successfully. Excess humidity and warmth can trigger premature aging, encourage mold or rot, and significantly reduce how long seeds remain viable. By protecting them from moisture and heat, you extend their shelf life and increase your chances of strong, healthy germination when you’re ready to plant.
Where is the best place to store seeds?
The refrigerator is one of the best places for reliable seed storage because it offers steady, cool temperatures and low humidity—two key factors in preserving seed viability. However, if fridge space is limited, a cool, dark spot in your home like a basement, interior closet, or unheated room can also work well. The goal is to avoid temperature swings and moisture, which can shorten the life of your seeds.
What containers are suitable for seed storage?
When it comes to storing your seeds, the right container makes a big difference. Plastic food storage bags, mason jars with tight-fitting lids, glass canisters with gasketed seals, and even old film canisters all work well to keep moisture out and protect seeds from air exposure. Whatever container you choose, make sure it’s clean, dry, and sealed securely to help maintain seed quality over time.
How can I check if my seeds are dry enough for storage?
For larger seeds like beans or peas, you can test for dryness before seed storage by carefully smashing a couple with a hammer. If the seeds shatter cleanly rather than bend or crush, that’s a good sign they’re fully dry and ready to be stored. This quick test helps prevent mold or spoilage later, especially when you’re saving your own seeds from the garden. Always be sure seeds are completely dry before sealing them in containers.
Should I use moisture absorbers with stored seeds?
Yes, using packets of powdered milk or silica gel is a great way to absorb excess moisture when storing your seeds. Just wrap a couple tablespoons of powdered milk in tissue and place it inside your storage container, or use a silica gel packet if you have one. These desiccants help create a drier environment, which extends the life of your seeds. However, avoid using oxygen absorbers—while they work well for food storage, seeds need a small amount of oxygen to remain viable over time.
How should I organize seeds from different years?
For better organization and more effective seed storage, keep each year’s seeds grouped together and clearly labeled with the date they were saved or purchased. This simple habit helps you track the age of your seeds at a glance, so you’ll know which ones are likely to have strong germination and which might be past their prime. It’s especially useful when rotating stock or planning next season’s planting.
What should I do before planting seeds that have been stored in the refrigerator?
When storing your seeds in a cool place like the refrigerator, it’s important to let the containers warm up to room temperature before opening them. If you open a cold container too soon, moisture in the air can condense on the seeds, causing them to stick together or even begin to spoil. Waiting just a little while before opening helps protect the seeds from unnecessary moisture and keeps them in better condition for planting.
How should I prepare seeds from my own plants for storage?
After collecting seeds from your garden, spread them out in a single layer on newspaper and let them air-dry for about a week. Be sure to write the seed variety directly on the paper to avoid mix-ups. Once they’re thoroughly dry, pack them into small paper packets or envelopes and label each one with the plant name, date collected, and any other helpful notes. This simple preparation step is essential for successful seed storage and helps ensure you’re ready when it’s time to plant again.
Why might some seeds fail to germinate even if stored properly?
Some seeds, such as sweet corn and parsnip, naturally have a shorter lifespan and lower germination rates, even when you’re carefully storing your seeds under ideal conditions. These varieties tend to lose viability more quickly than others, so it’s best to plant them within a year of saving or purchasing. While proper storage helps extend the life of most seeds, it’s still wise to check germination rates or refresh your supply annually for seeds known to decline faster.