

Whether you’re a complete beginner or a seasoned gardener, learning to grow microgreens indoors is one of the easiest and most rewarding projects you can take on. With just a few simple supplies—such as shallow containers (clean deli or lunch meat trays are perfect for recycling and saving money), quality seed-starting soil, a bit of water, and a source of light—you can have fresh, vibrant greens growing right on your windowsill, countertop, or under grow lights all year long. No outdoor space is needed, and even a small apartment can become your personal microgreen garden.
Microgreens are more than just trendy; they’re packed with flavor and dense in nutrients, often containing higher vitamin and antioxidant levels than their fully grown counterparts. These tiny greens grow quickly, usually ready to harvest in 7–14 days, and they require very little space or maintenance. While buying microgreens at the store can be costly, growing your own not only saves money but also ensures you have a constant supply of fresh, healthy greens to enhance your meals.
This is also an excellent project to do with kids, as they’ll love seeing the seeds sprout and grow almost overnight—and they might even be more excited to eat their greens! With just a few minutes of care each day, you’ll be amazed at how easy and fun it is to grow microgreens indoors. Ready to get started? Let’s walk through the simple step-by-step process to start growing your own microgreens today.
Table of Contents
Choose and Order Your Heirloom Microgreen Seeds:
Before you can plant your heirloom microgreens, the first step is to choose which varieties you want to grow and order your seeds. There are dozens of excellent options available, but some types are especially well-suited for beginners because they germinate quickly, grow reliably, and deliver great flavor and nutrition. When you’re just starting to grow microgreens indoors, it’s a good idea to begin with fast-growing, tried-and-true varieties that give satisfying results with minimal effort.
Discover Why Gardeners Recommend Our Seeds!
Below are some of the most popular and easy-to-grow microgreens you can plant at home:
- Amaranth
- Arugula
- Beet
- Basil
- Borage
- Broccoli
- Cabbage
- Carrot
- Cilantro
- Collards
- Dill
- Kale
- Kohlrabi
- Lettuce
- Mustard
- Parsley
- Spinach
- Radish
Gather your Microgreens growing supplies:
- Heirloom Microgreen Seeds
- Seed starting soil
- Containers for growing in
- Labels or tape, and a marker
- Water( a spray bottle works really well to mist the seeds)
- A light source(south-facing window or grow-light)
Why Seed Starting Mix Works Best for Microgreens
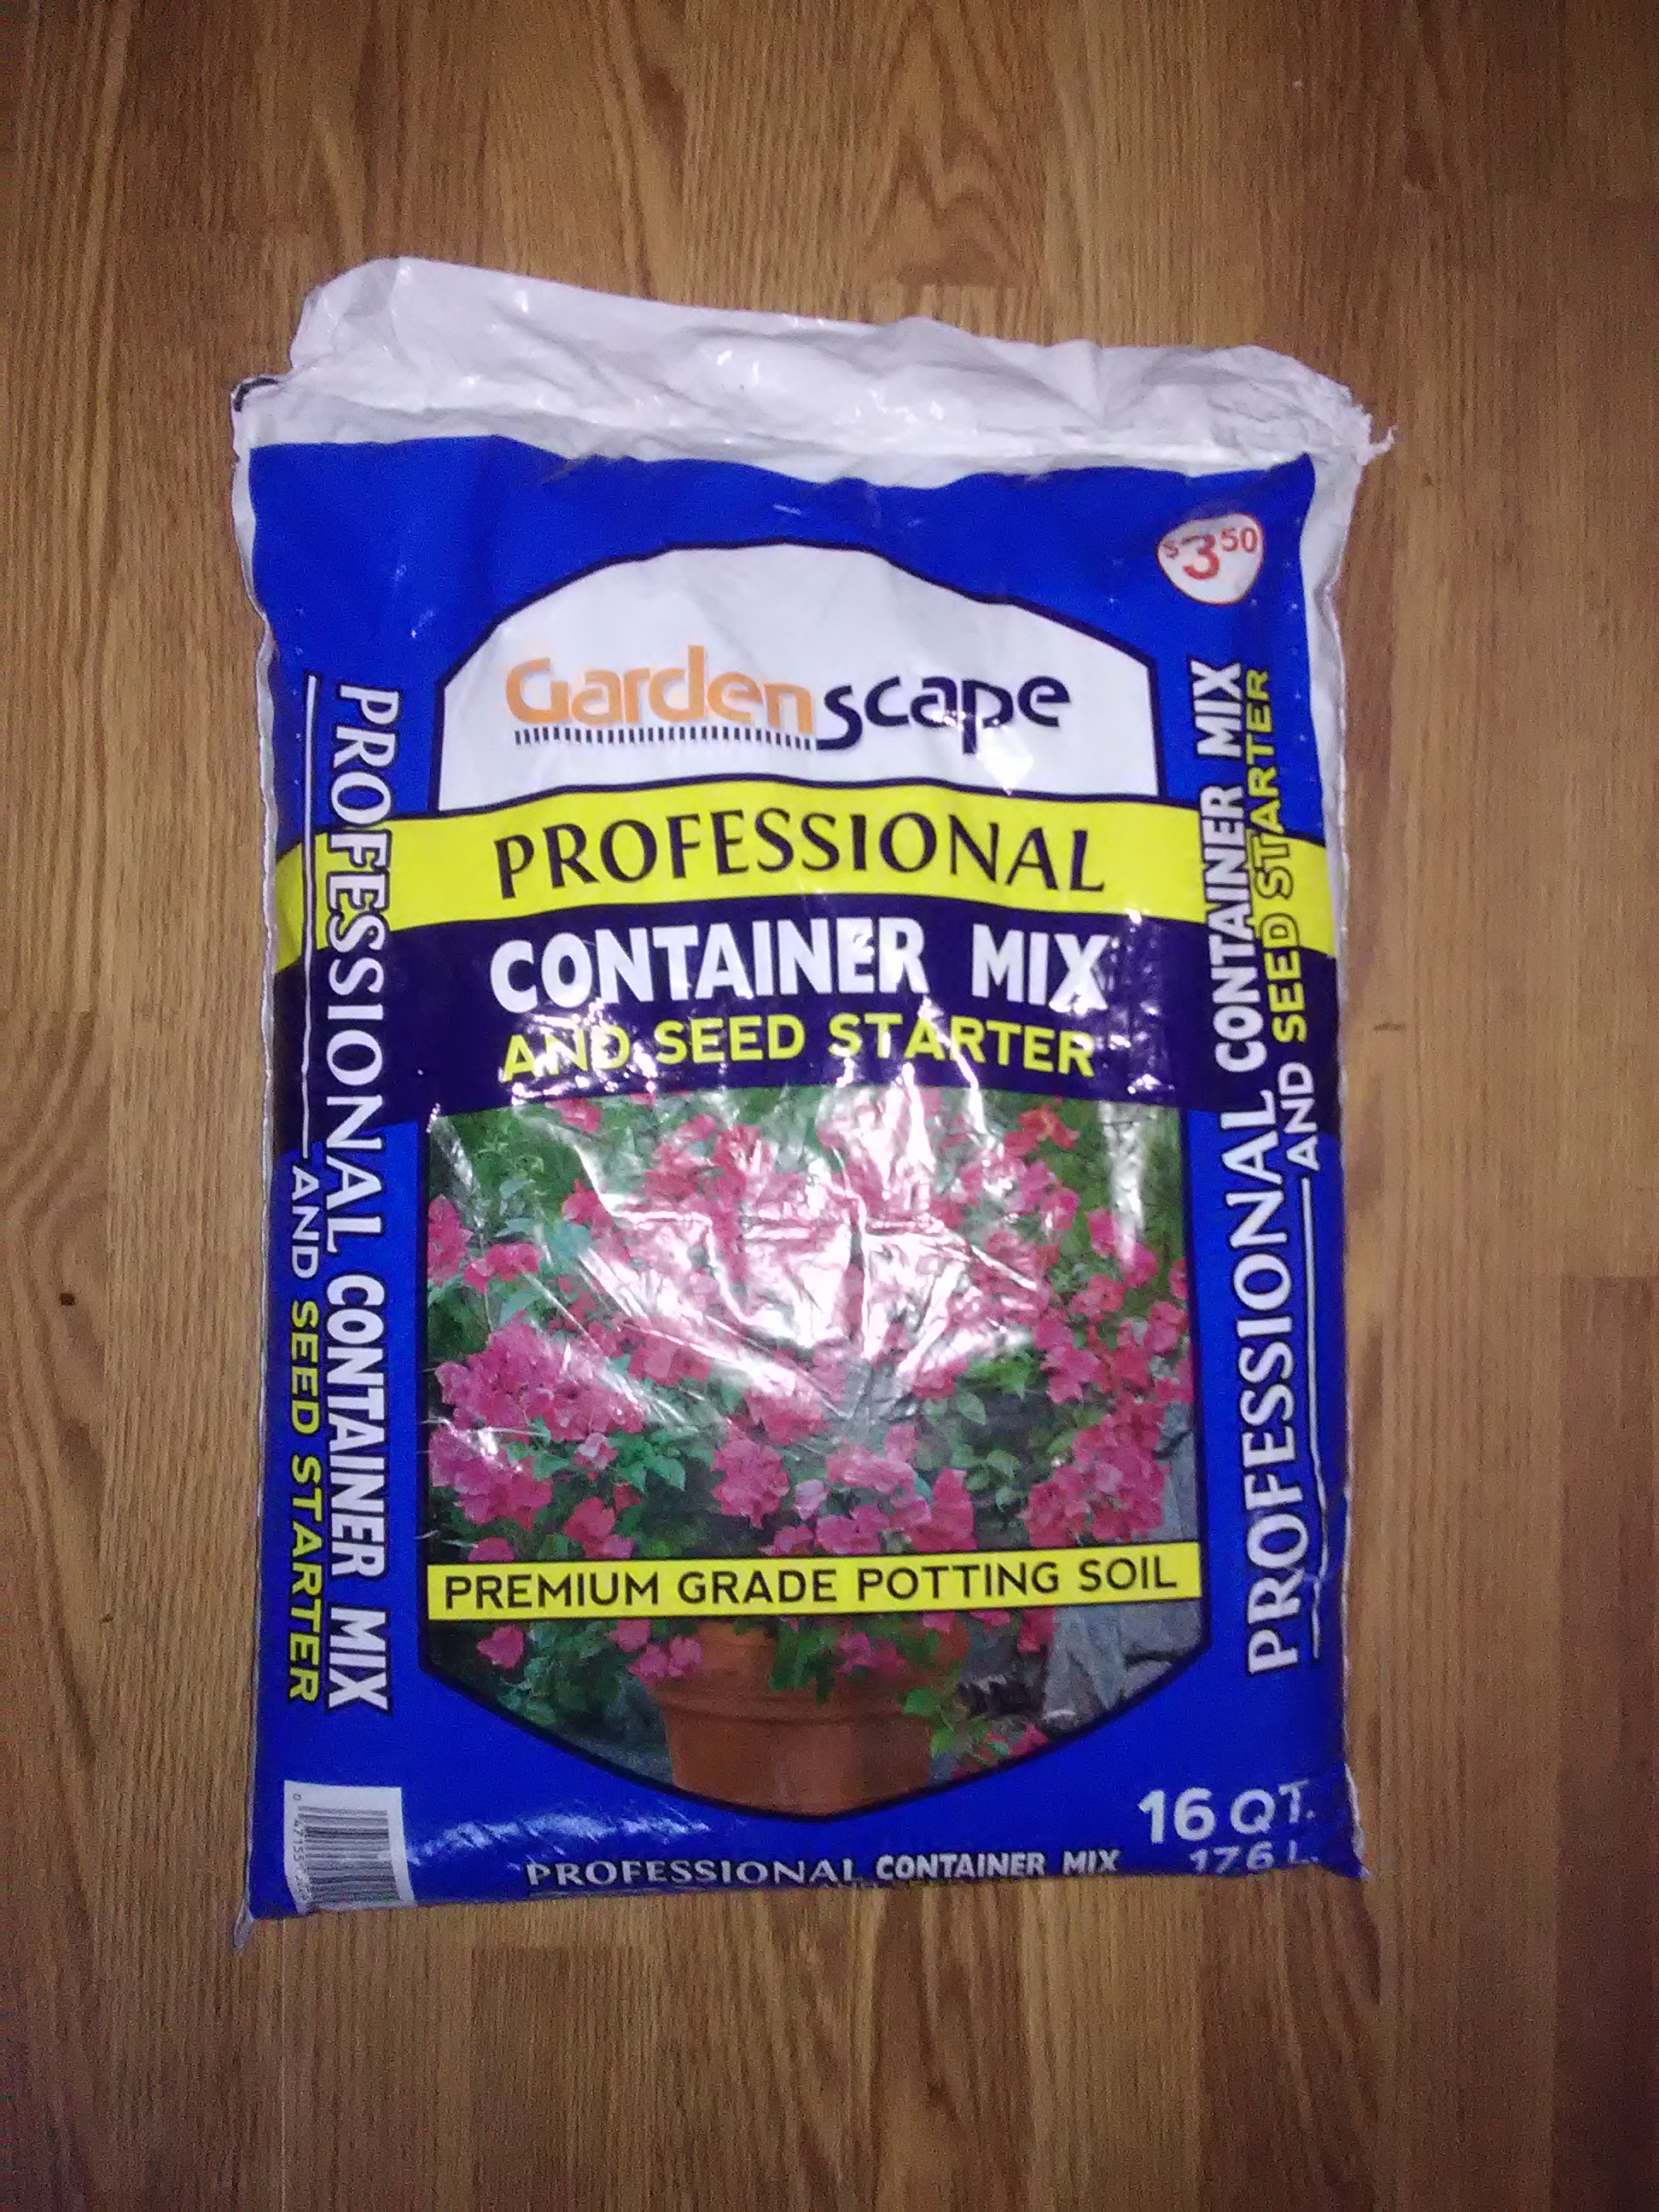
When it comes to growing microgreens indoors, the type of soil you use can make a big difference in how well your seeds germinate and grow. The best option is a light, fine-textured mix—specifically a combination of seed-starting mix and a small amount of regular potting soil. Regular potting soil on its own is often too bulky and coarse, with large pieces of bark or organic matter that can obstruct delicate seedlings as they emerge. A finer seed-starting blend creates a soft, airy surface that allows for even seed coverage and strong root development without resistance.
The mix pictured worked surprisingly well (especially since it was the only option we could find in stores at the time!), but in general, we prefer dedicated seed-starting mixes. These are specially formulated to support early growth and retain just the right amount of moisture without becoming soggy. They’re also sterile, which helps reduce the risk of damping-off disease and other common seedling problems.
Using the right soil gives your microgreens the best start possible and sets the stage for fast, healthy growth. If you’re planning to grow microgreens indoors regularly, it’s worth keeping a bag of seed-starting mix on hand—it really is the ideal growing medium.
Click Here to Purchase Microgreen Seeds!
Budget-Friendly Containers for Growing Microgreens Indoors
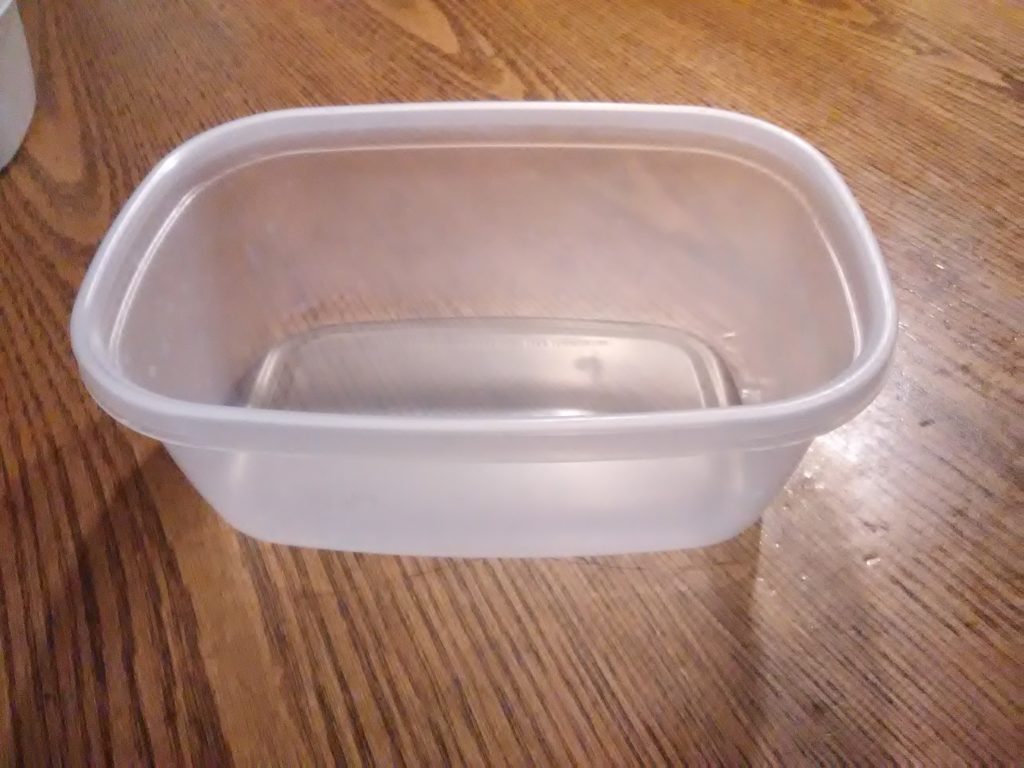
You can use almost any shallow, empty container that’s about 2 to 3 inches deep to grow microgreens indoors—no need to buy anything fancy. In fact, this is a great opportunity to reuse and recycle what you already have around the house. Clean deli containers, clear take-out trays, disposable pie tins, fruit or salad containers with lids, and even shallow tubs from sour cream, cottage cheese, or lunch meat all work wonderfully. These types of containers are not only the perfect size for growing microgreens indoors, but they also help reduce waste and save money.
Clear lids can be especially helpful during germination, acting like a mini greenhouse to trap moisture and warmth. Just be sure to poke a few drainage holes in the bottom if your container doesn’t already have some, to prevent water from pooling and causing mold or root rot. Using recycled containers is one of the easiest and most budget-friendly ways to set up your microgreen trays—and they really do work just as well as commercial options when you grow microgreens indoors.
Growing with Kids: Fun, Healthy, and Hands-On
This is a great time to get kids involved in the process. Teaching your children to grow microgreens not only gives them a sense of accomplishment and responsibility, but also encourages healthy eating habits from a young age. Watching seeds sprout and grow into food they can cut and eat themselves makes the experience fun, educational, and rewarding. Whether they’re helping with watering, labeling trays, or snipping greens at harvest, kids love being part of the process—and they’re often more excited to eat what they helped grow.
Labeling Your Microgreens: Why It Matters
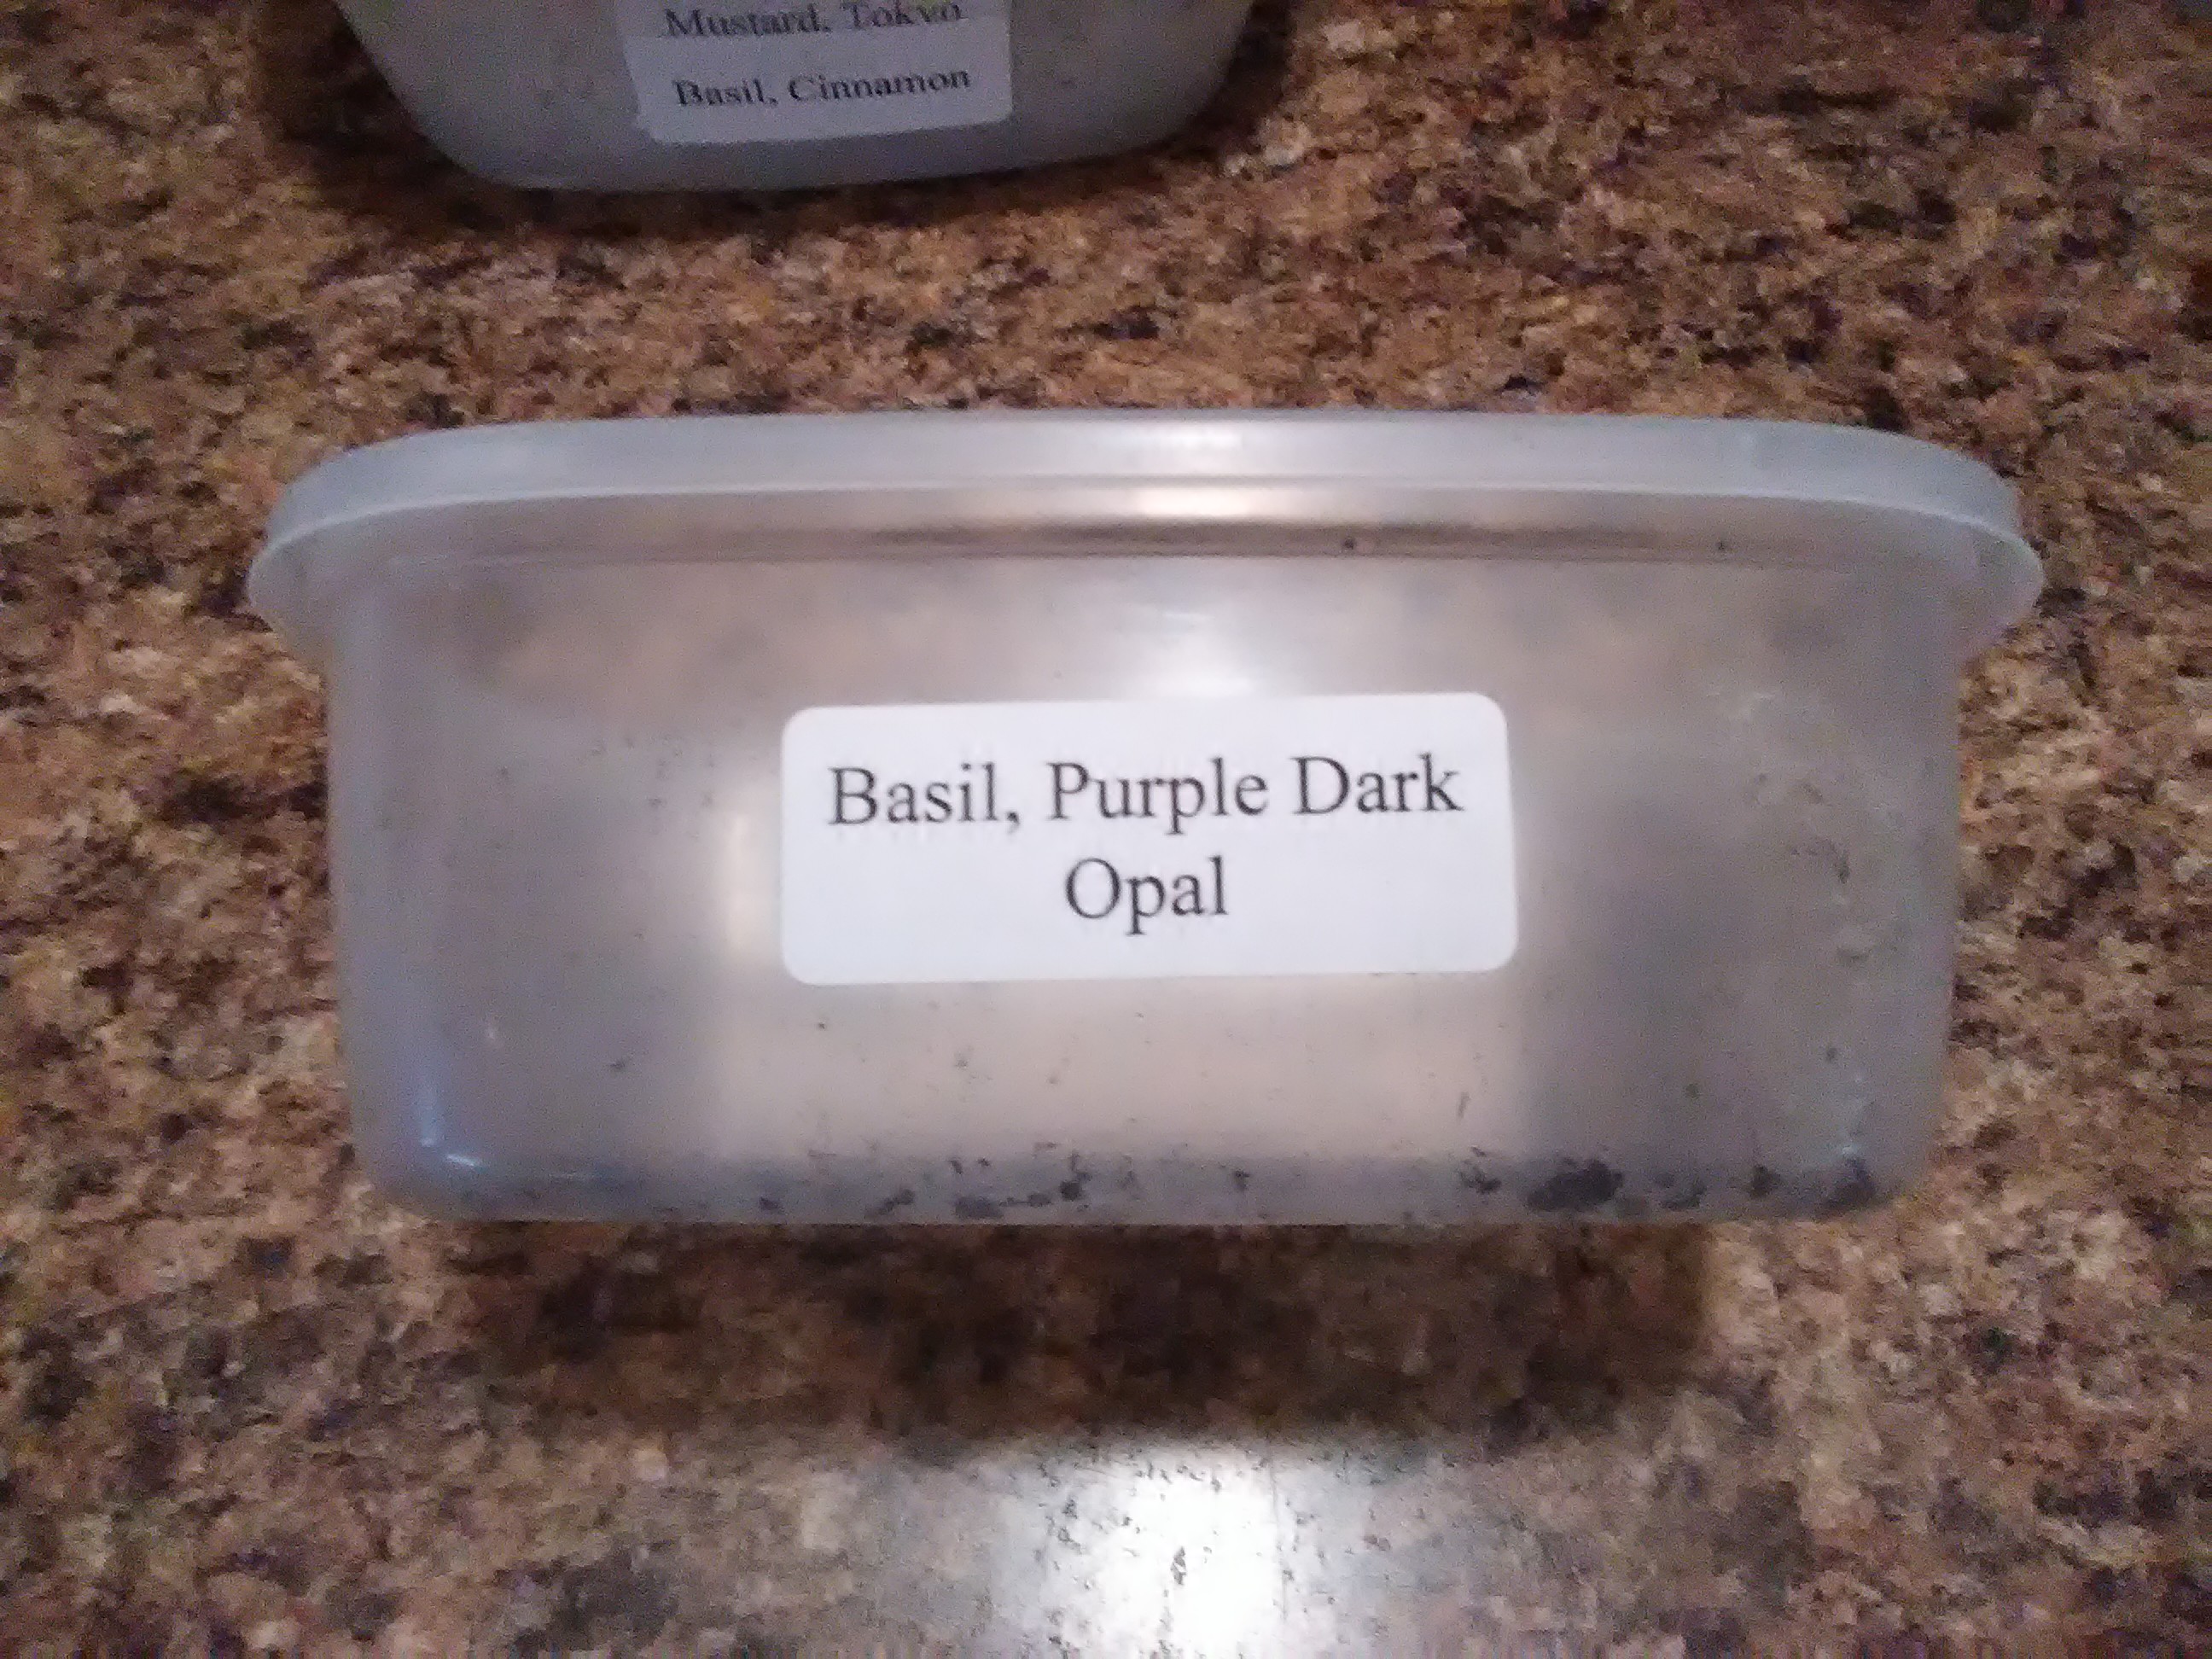
Make sure you have a good supply of labels or masking tape along with a permanent marker so you can clearly label each container before or right after planting. This simple step makes a big difference—when your microgreens begin to sprout, many varieties can look very similar in the early stages, especially greens like kale, broccoli, mustard, or cabbage. Having a label helps you track which seeds are growing where, making it easier to monitor germination times, compare growth rates, and identify your favorites when it comes time to harvest.
Labeling also comes in handy if you’re experimenting with different seed types or soil blends as you grow microgreens indoors, giving you a reliable way to observe what works best over time.
Getting Started: Sow Your Microgreens with Confidence
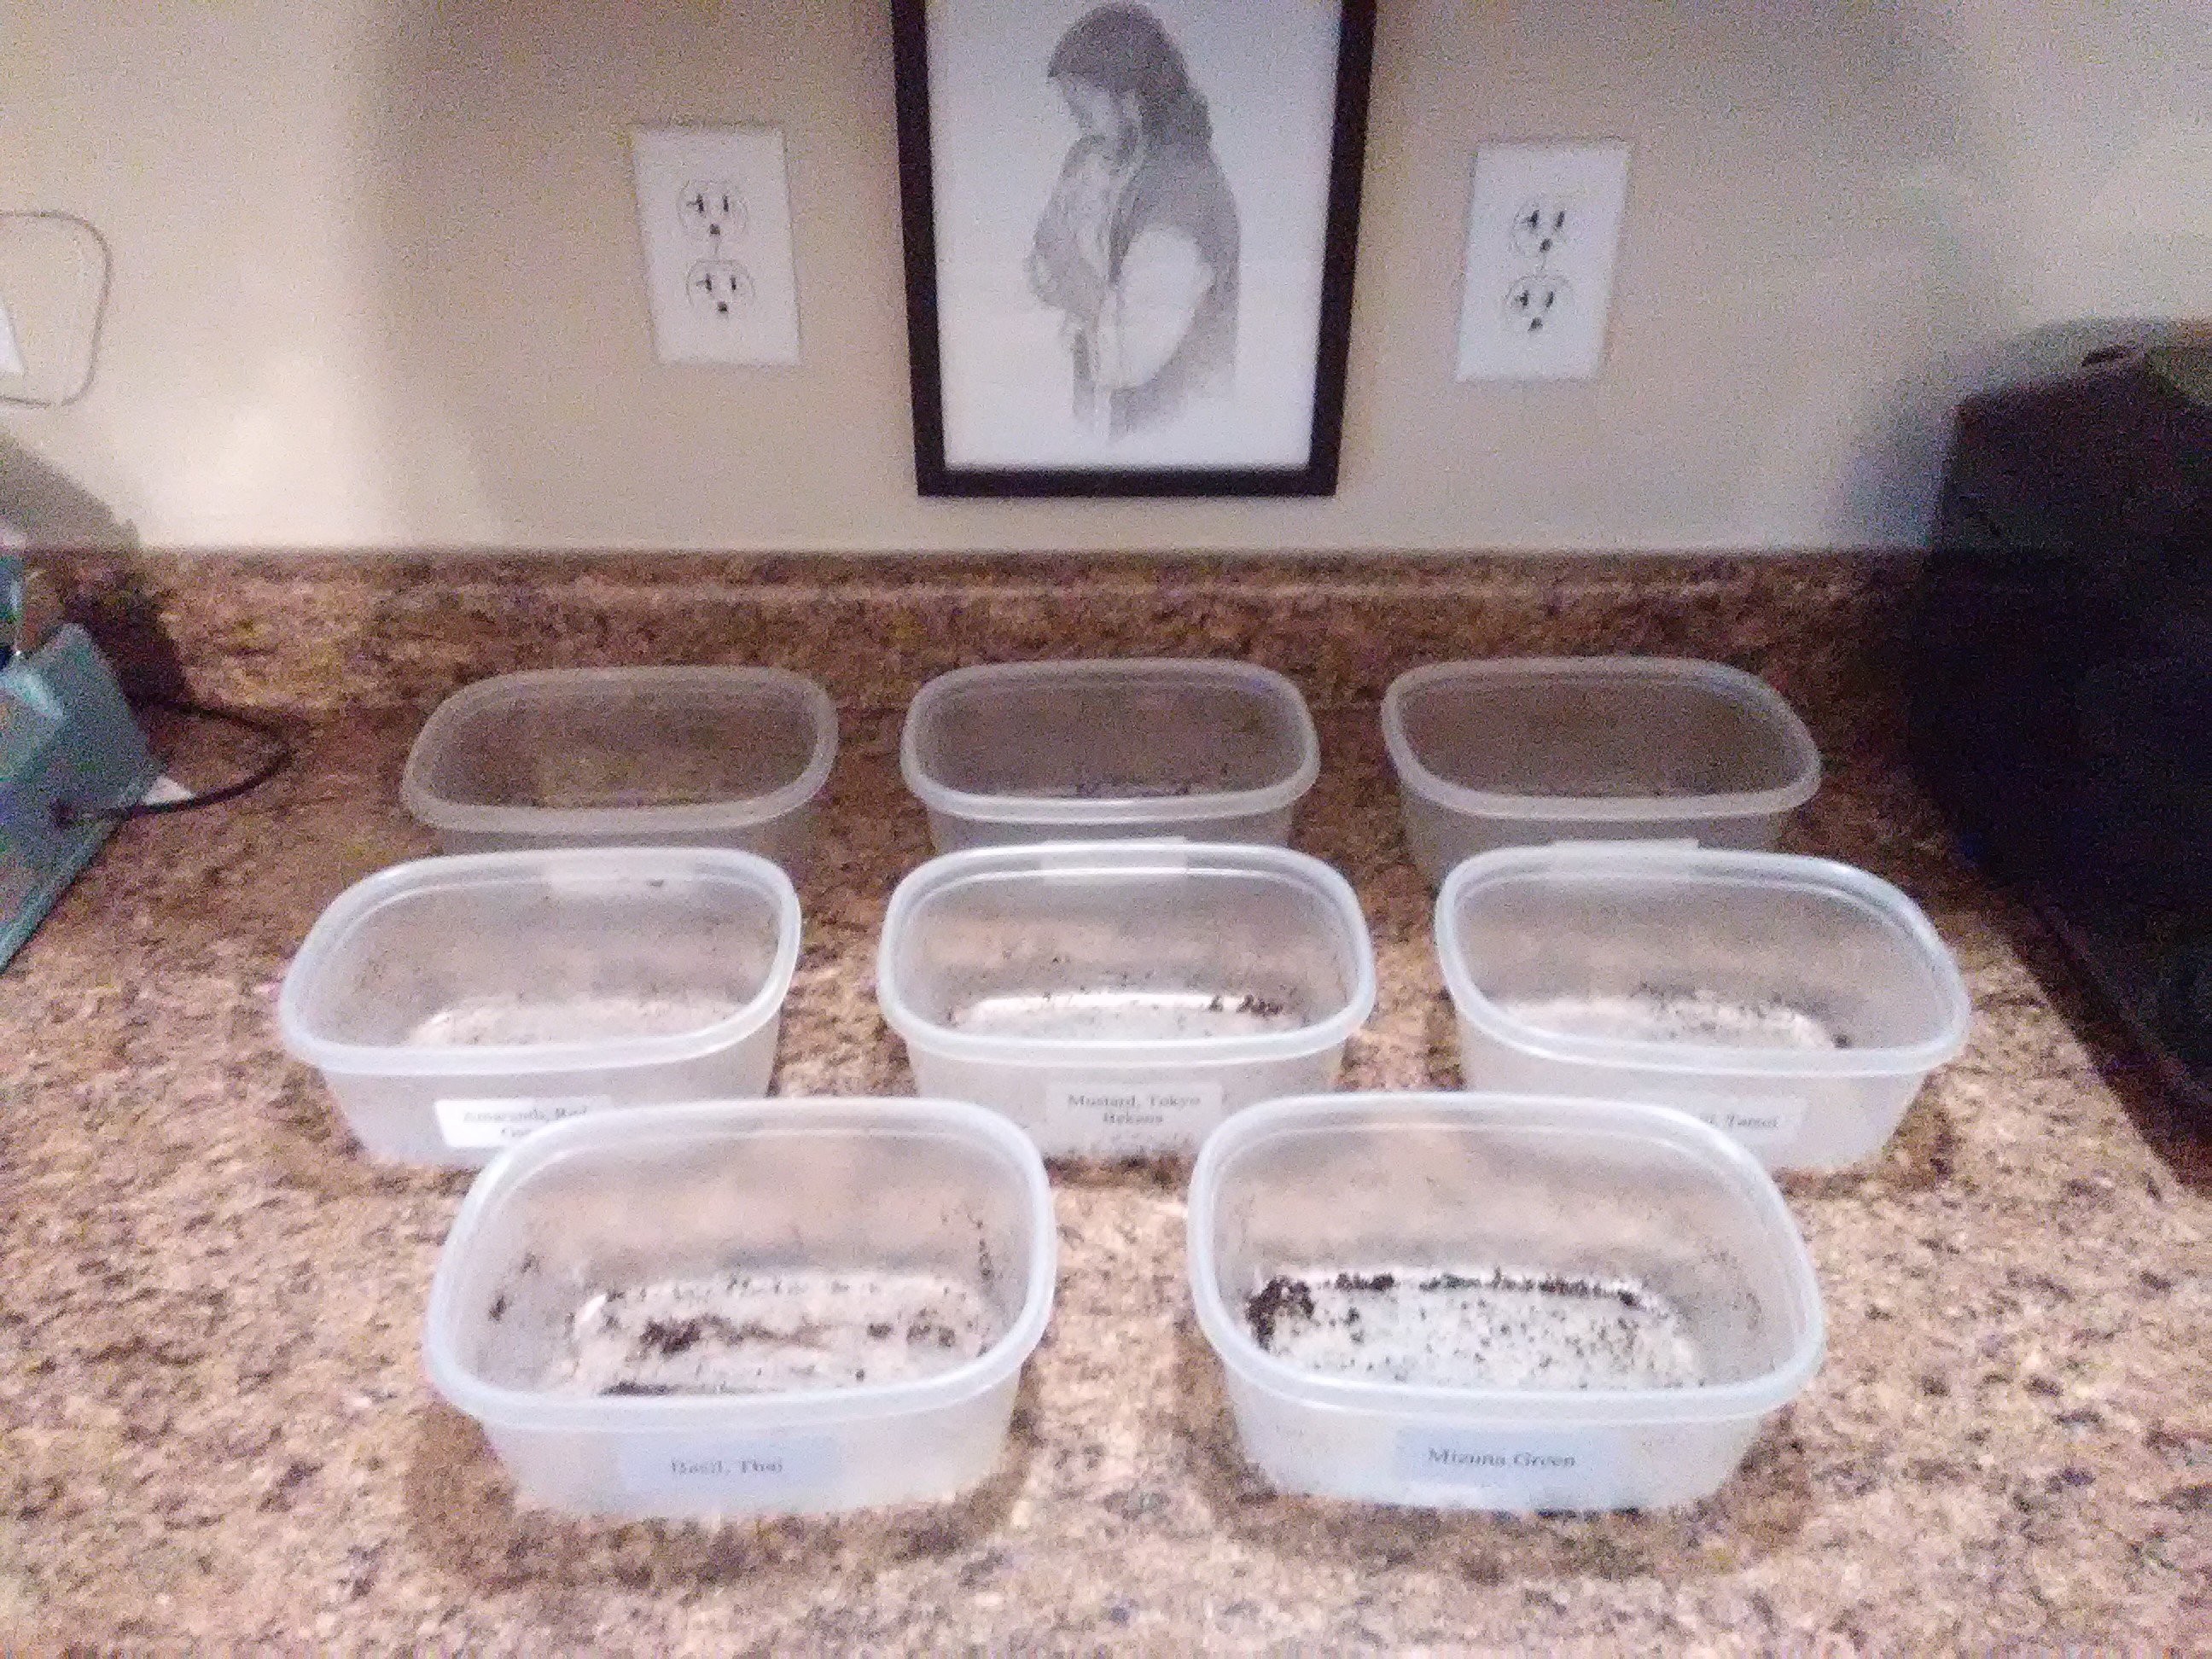
Once you’ve gathered all your supplies and selected your microgreen seeds, it’s time to set up your growing containers. Lay out your clean, shallow trays or recycled containers in a well-lit workspace, making sure each one is dry and free of any leftover food residue. Organizing your containers ahead of time helps streamline the process and ensures you have enough space to plant each variety you’ve chosen. This is also a great moment to double-check your labels so you can keep track of what you’re growing. With everything arranged and ready to go, you’re just about set to start planting.

Add about an inch to an inch and a half of your seed-starting mix or potting soil blend to each clean container, spreading it out evenly to create a flat, level surface. Avoid compacting the soil—keeping it light and fluffy allows for better airflow and makes it easier for delicate microgreen roots to take hold. Once the soil is in place, gently sprinkle your seeds across the entire surface in a thin, even layer.
Microgreens are typically grown densely, so it’s okay if the seeds are close together, but try to avoid large clumps to ensure consistent growth and airflow as they sprout. This simple step sets the stage for healthy germination and strong, even coverage as you grow microgreens indoors.
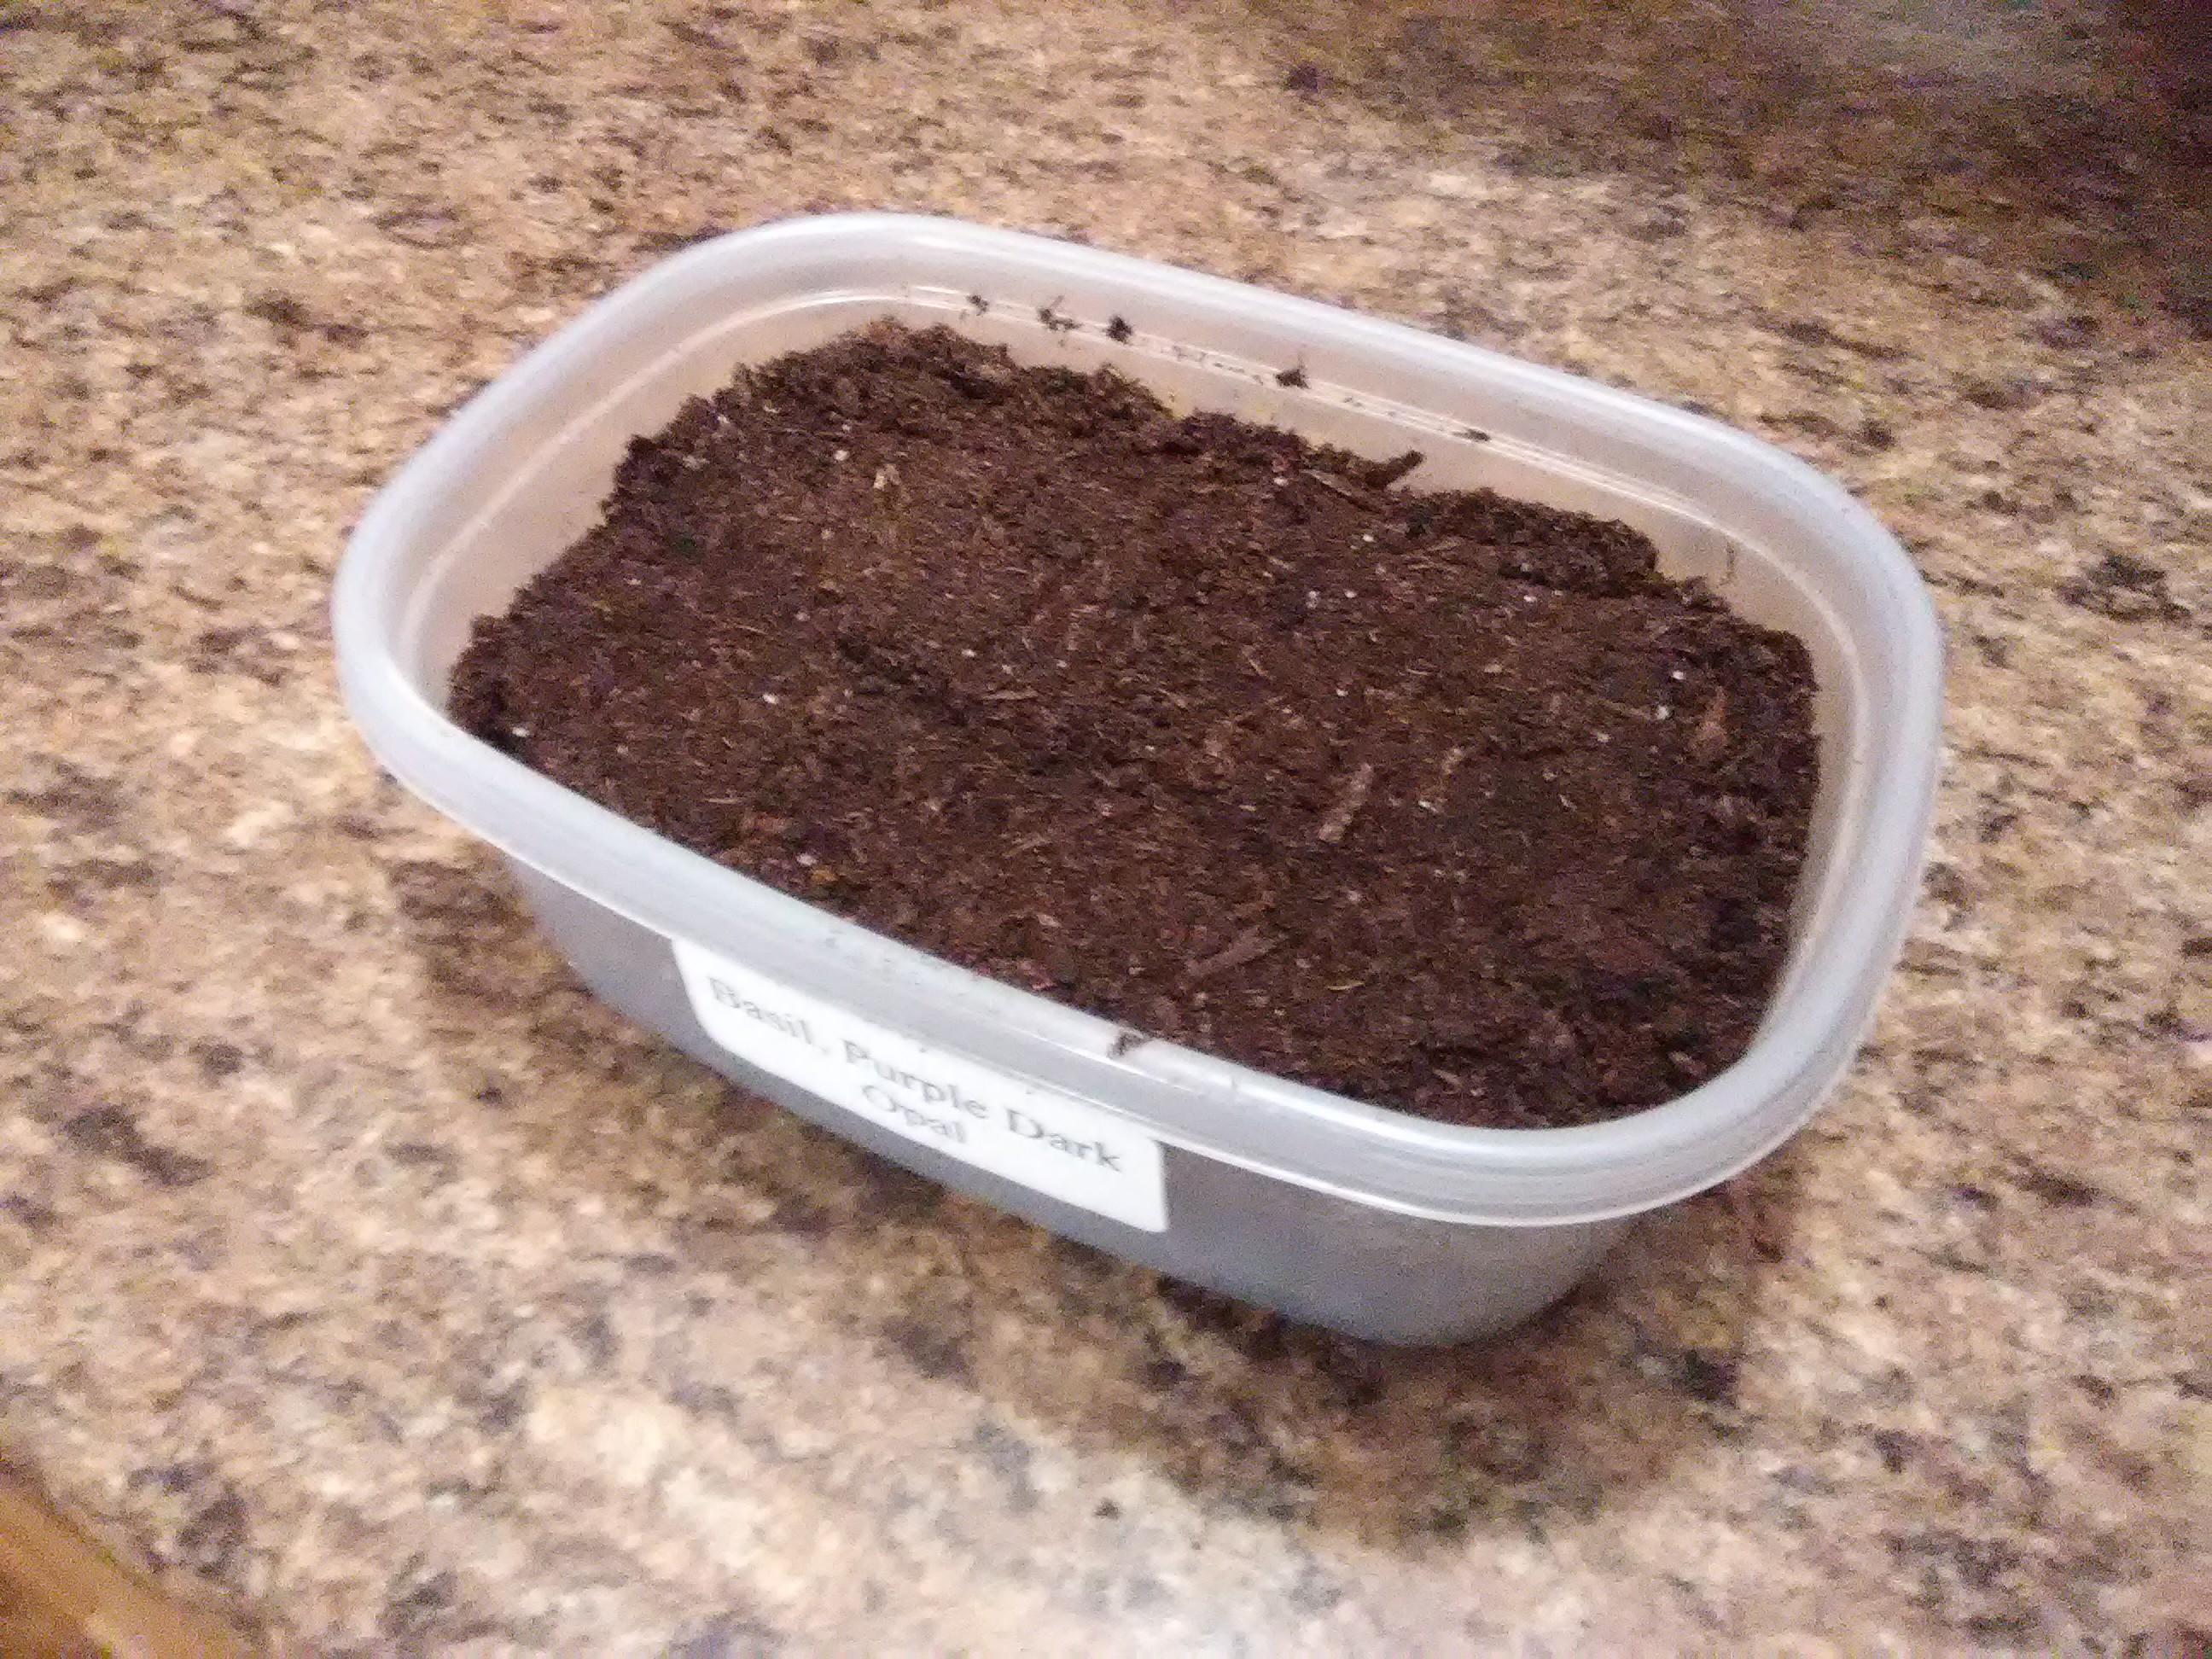
There’s no need to press or pack the soil down after filling your container—in fact, it’s better if the soil remains loose and airy. Compacting the soil can make it harder for the delicate roots and shoots of your microgreens to push through, which may delay germination or lead to uneven growth. Loose soil allows for better drainage, improved oxygen flow to developing roots, and faster, more consistent sprouting. When you grow microgreens indoors, maintaining a light, well-aerated soil surface gives your seeds the best possible start and helps ensure strong, healthy plants from day one.
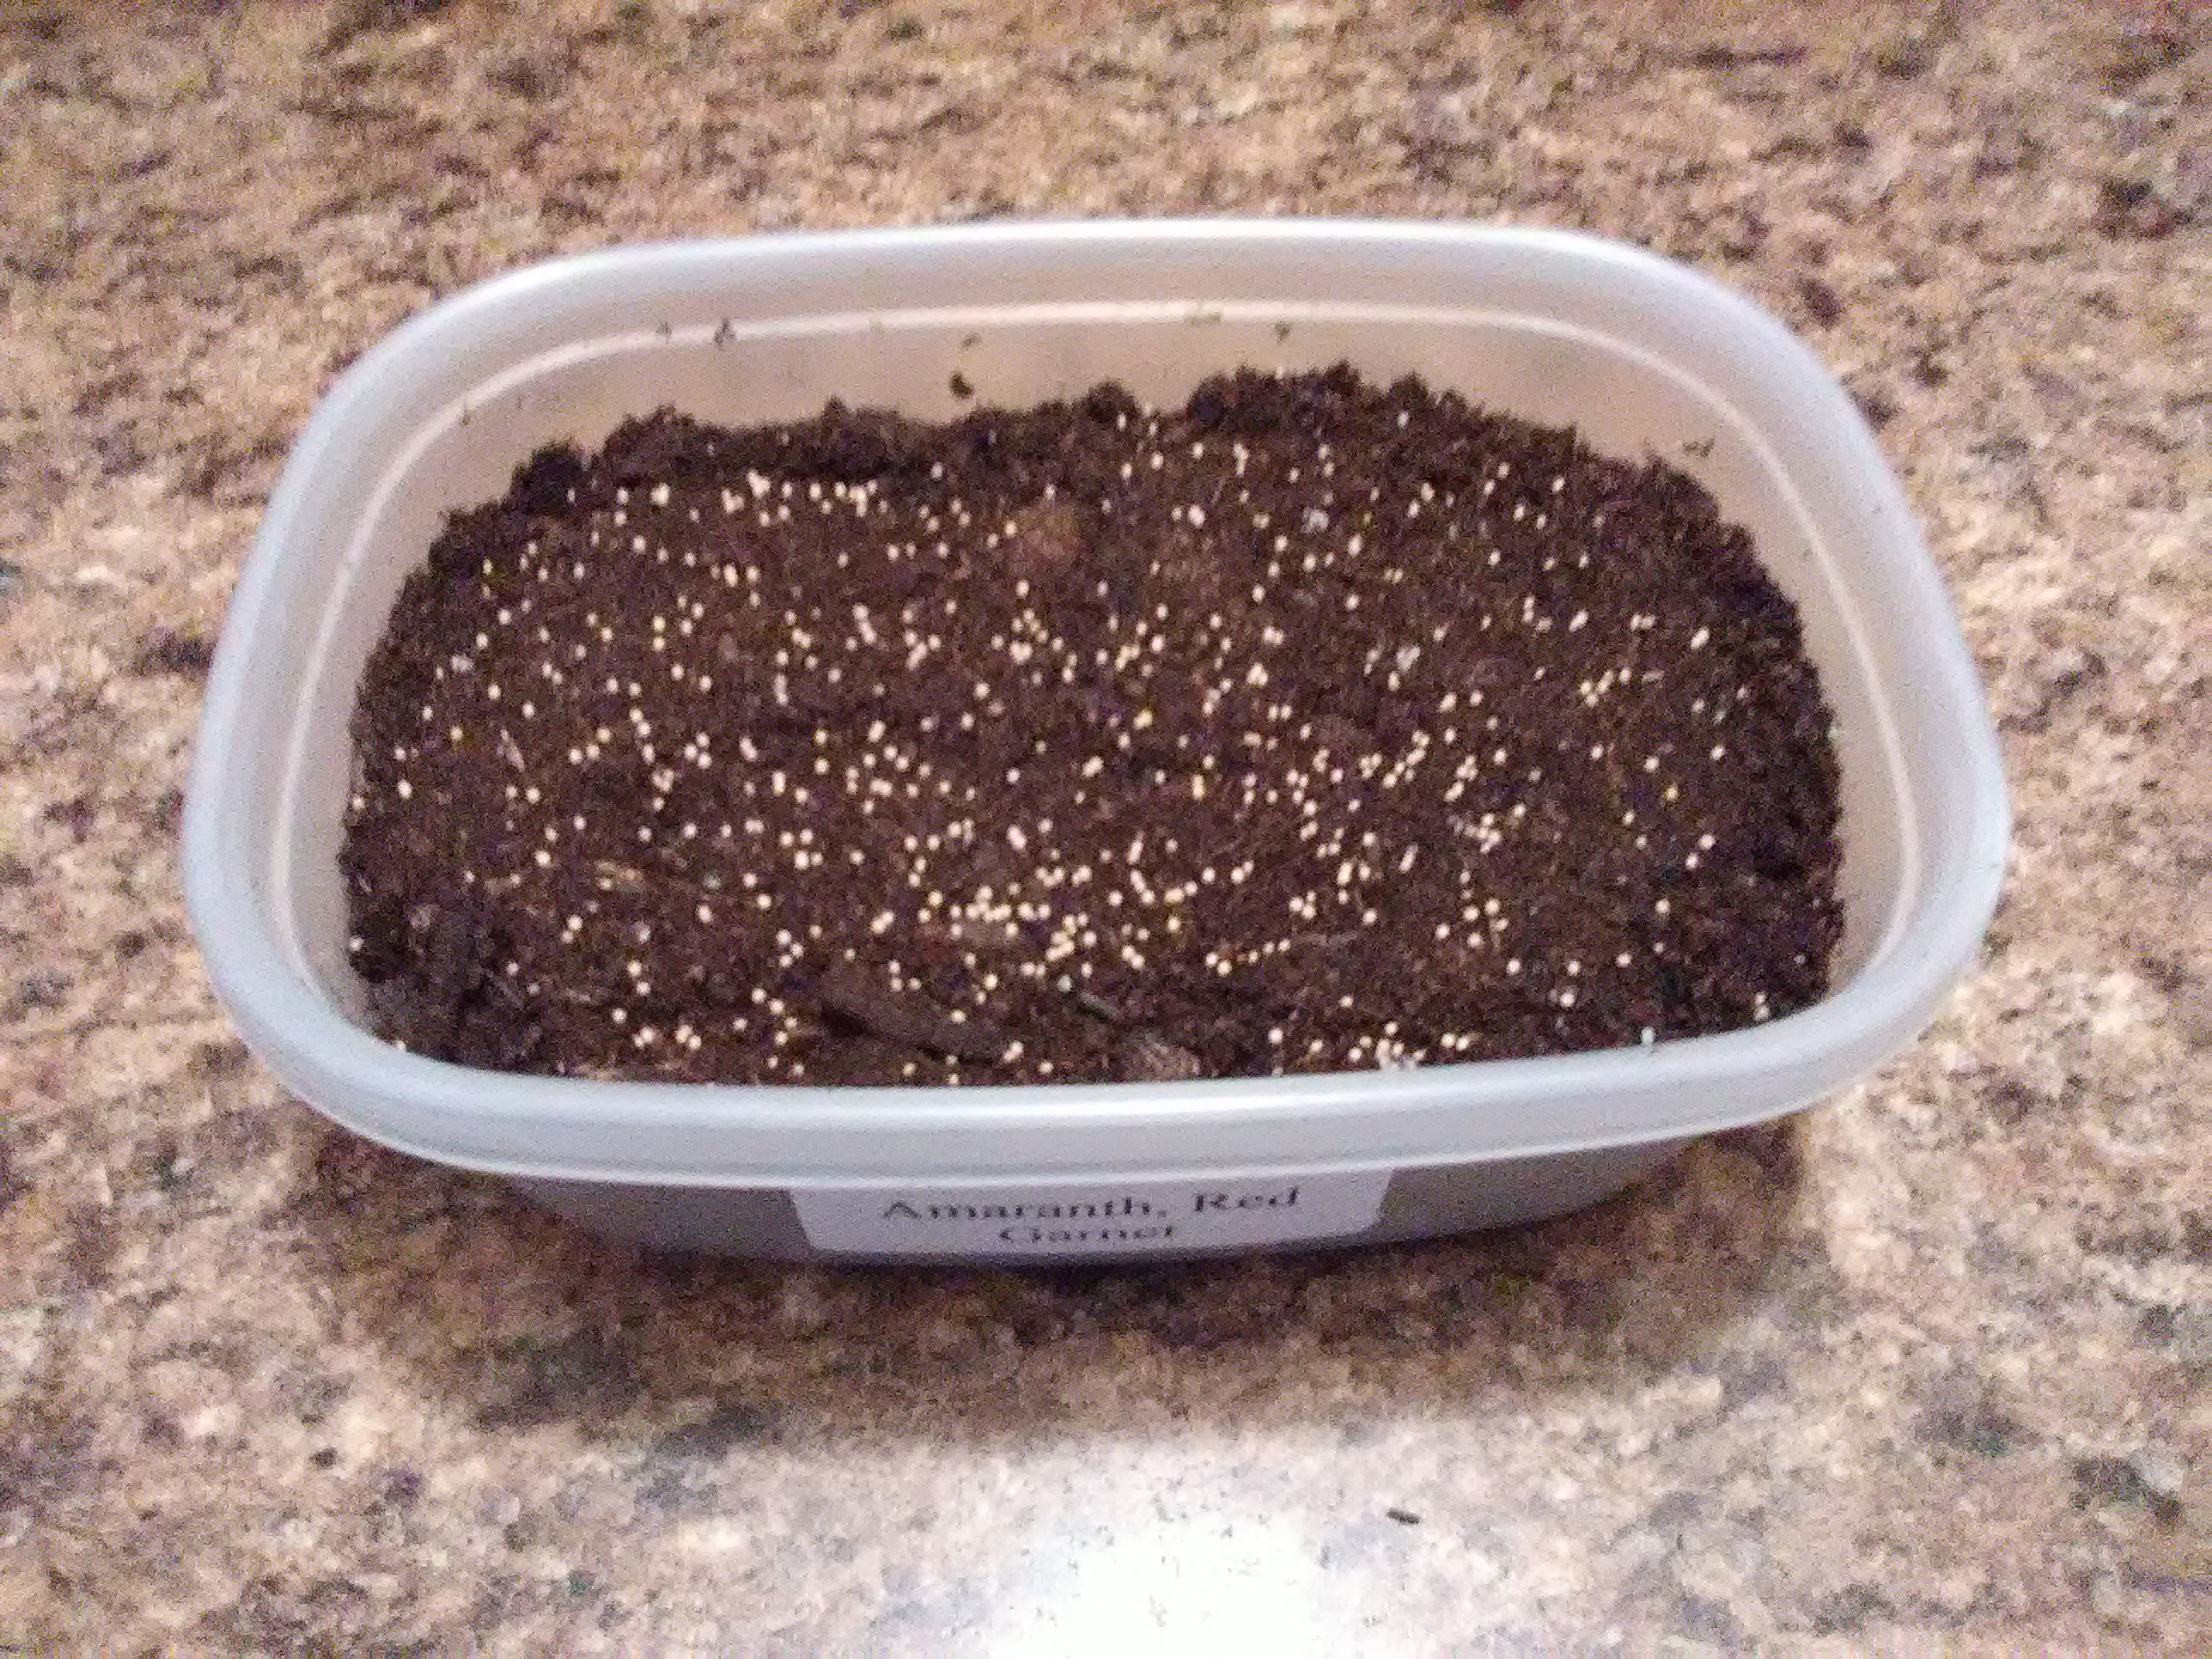
After spreading your soil evenly, it’s time to sow your seeds. Sprinkle them generously across the surface, aiming for an even distribution without clumping. Microgreens are grown densely, so don’t worry if the seeds are close together—that’s exactly what you want. Once the seeds are in place, lightly cover them with a thin layer of dry seed-starting mix, just enough to barely hide them. This helps keep them moist and in contact with the soil while still allowing light and air to reach the surface. Be careful not to press them down; a gentle hand is all that’s needed to give your microgreens the best possible start.
Lighting Tips for Growing Microgreens Indoors
- Light is essential. Healthy, flavorful microgreens need plenty of light to grow strong and upright. Without adequate light, they may become leggy, pale, or weak.
- Natural light works if it’s bright. A south-facing windowsill can provide enough sunlight for many varieties, especially during spring and summer.
- Supplement with grow lights. If natural light is limited—especially in winter or shaded rooms—a full-spectrum grow light is ideal. Place it just a few inches above the trays.
- Aim for 12–16 hours of light daily. Microgreens need long hours of consistent light. Use a timer to keep your lighting schedule on track.
- Rotate trays for even growth. Whether using sunlight or artificial light, rotating your trays daily helps prevent leaning and ensures uniform exposure.
With proper lighting, you can successfully grow microgreens indoors all year long, producing vibrant greens with excellent color and flavor.
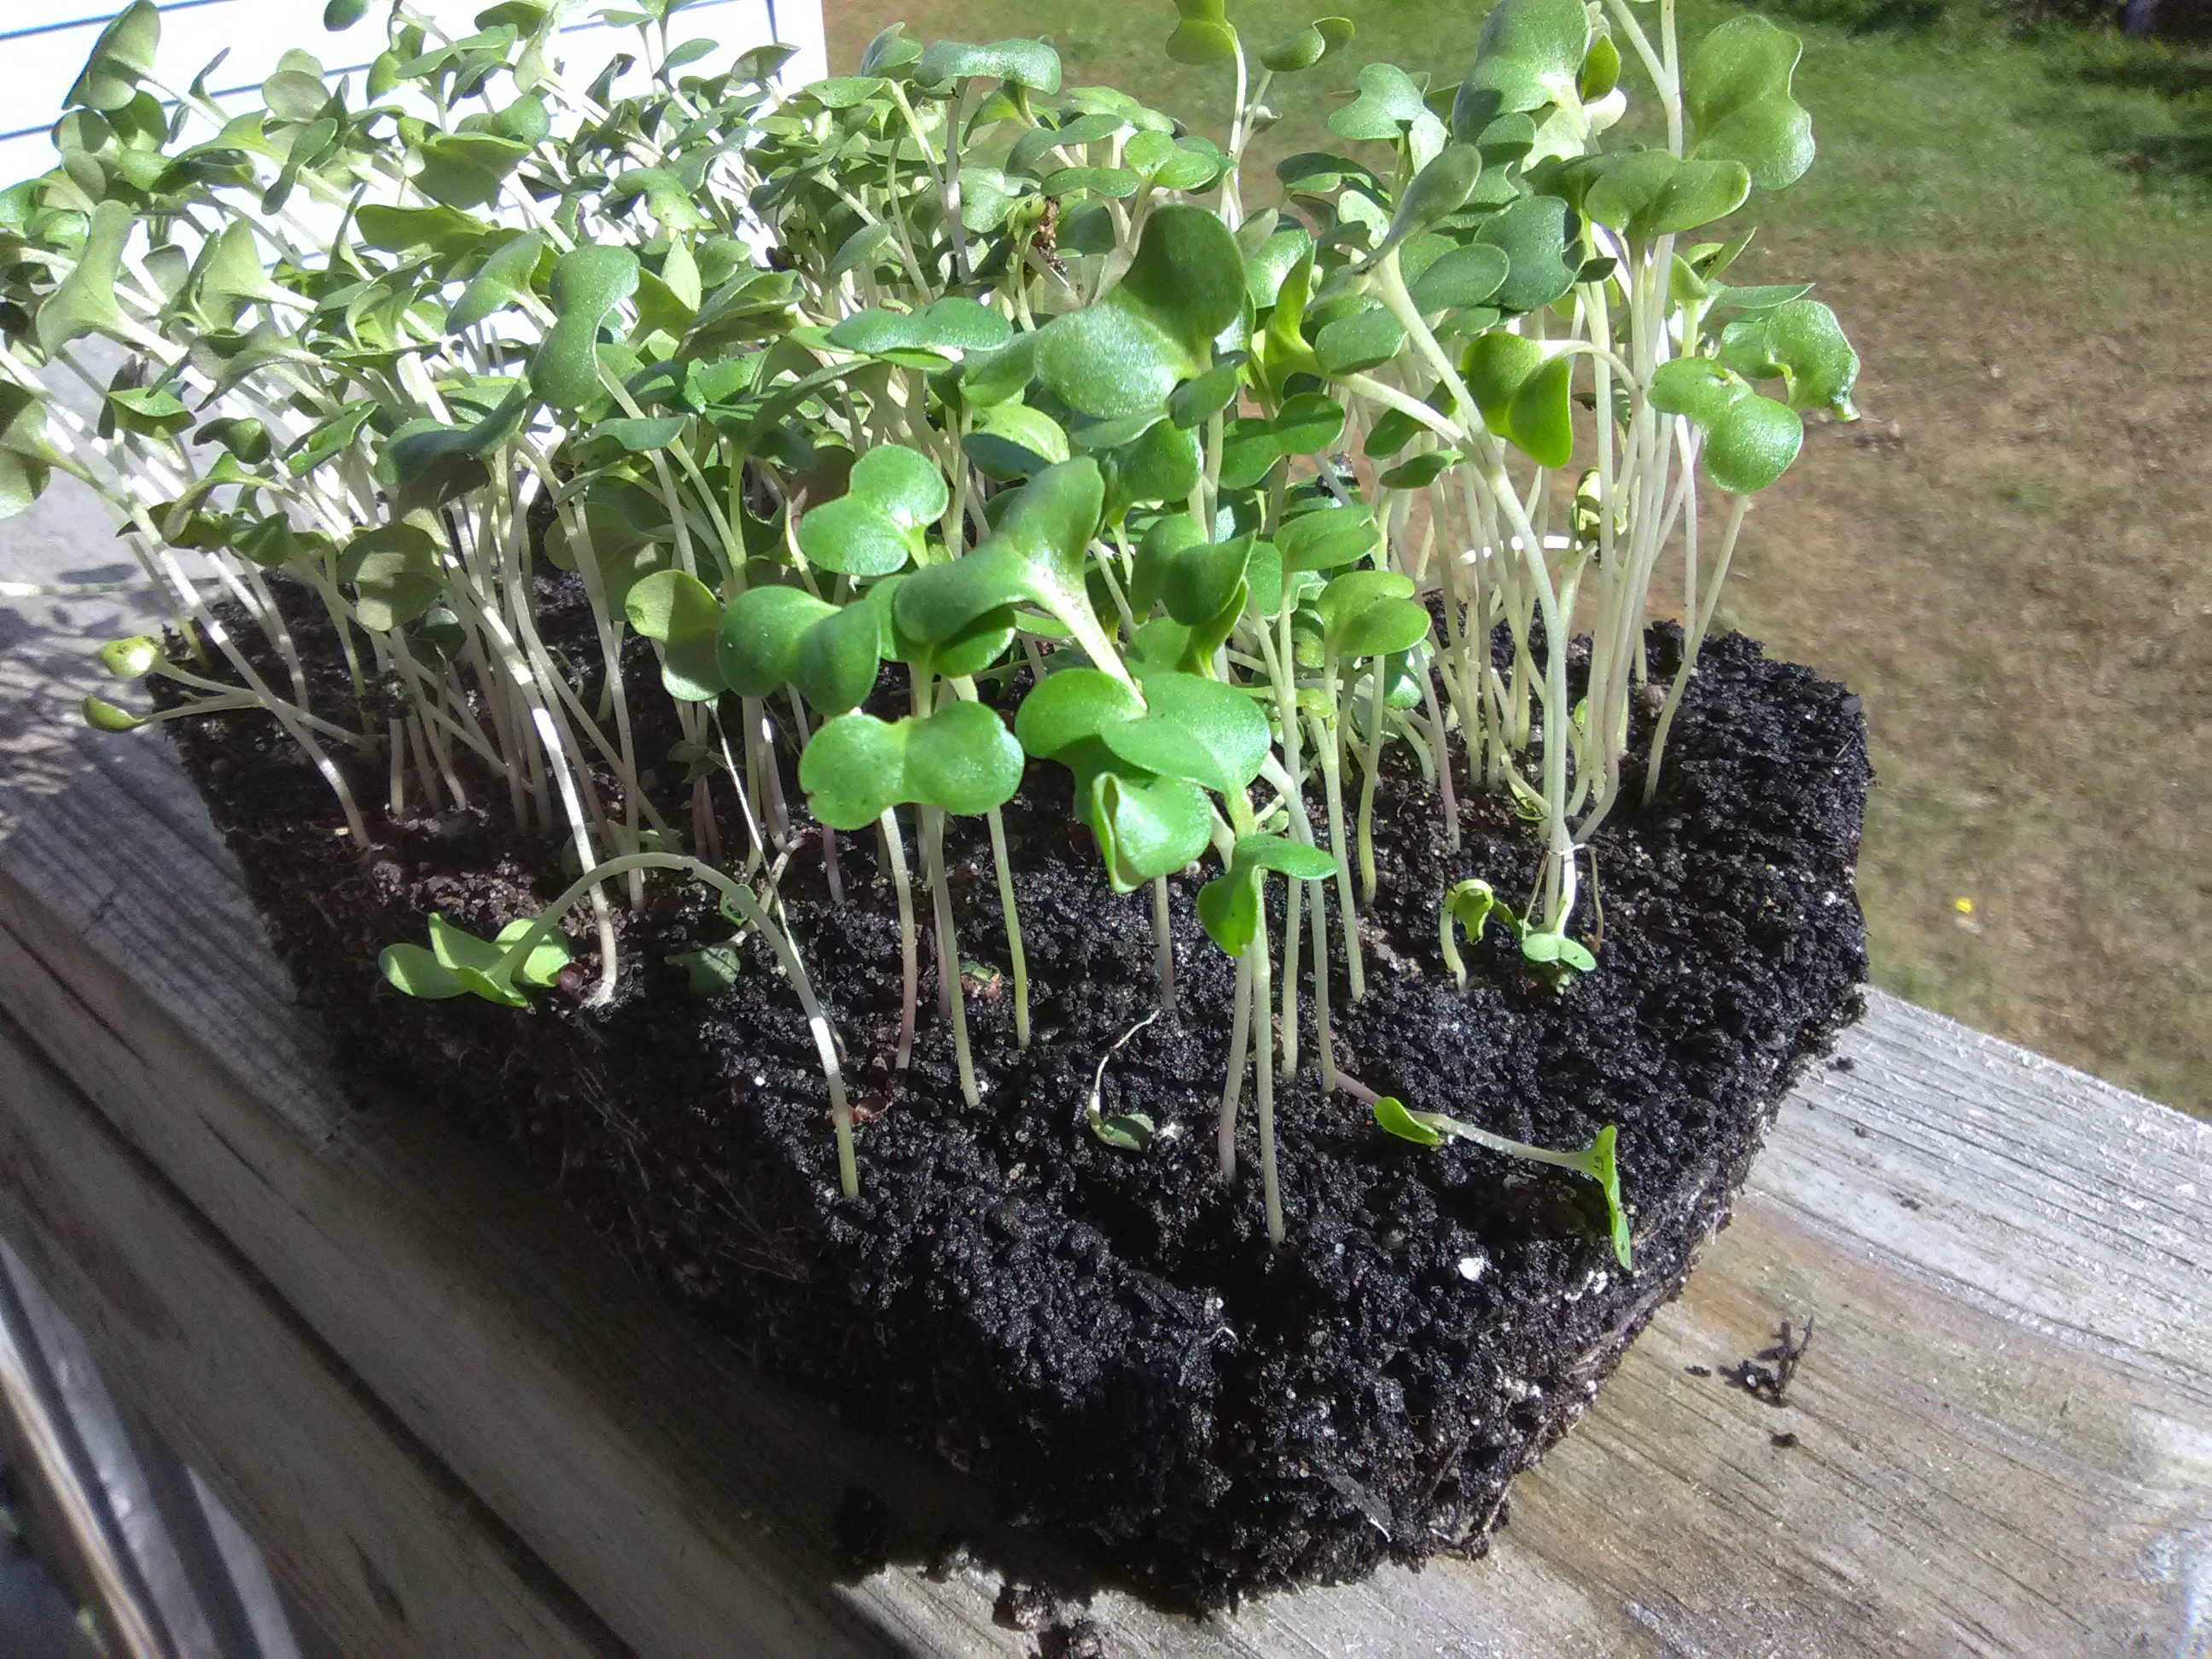
Harvesting Your Microgreens: When and How to Cut Them
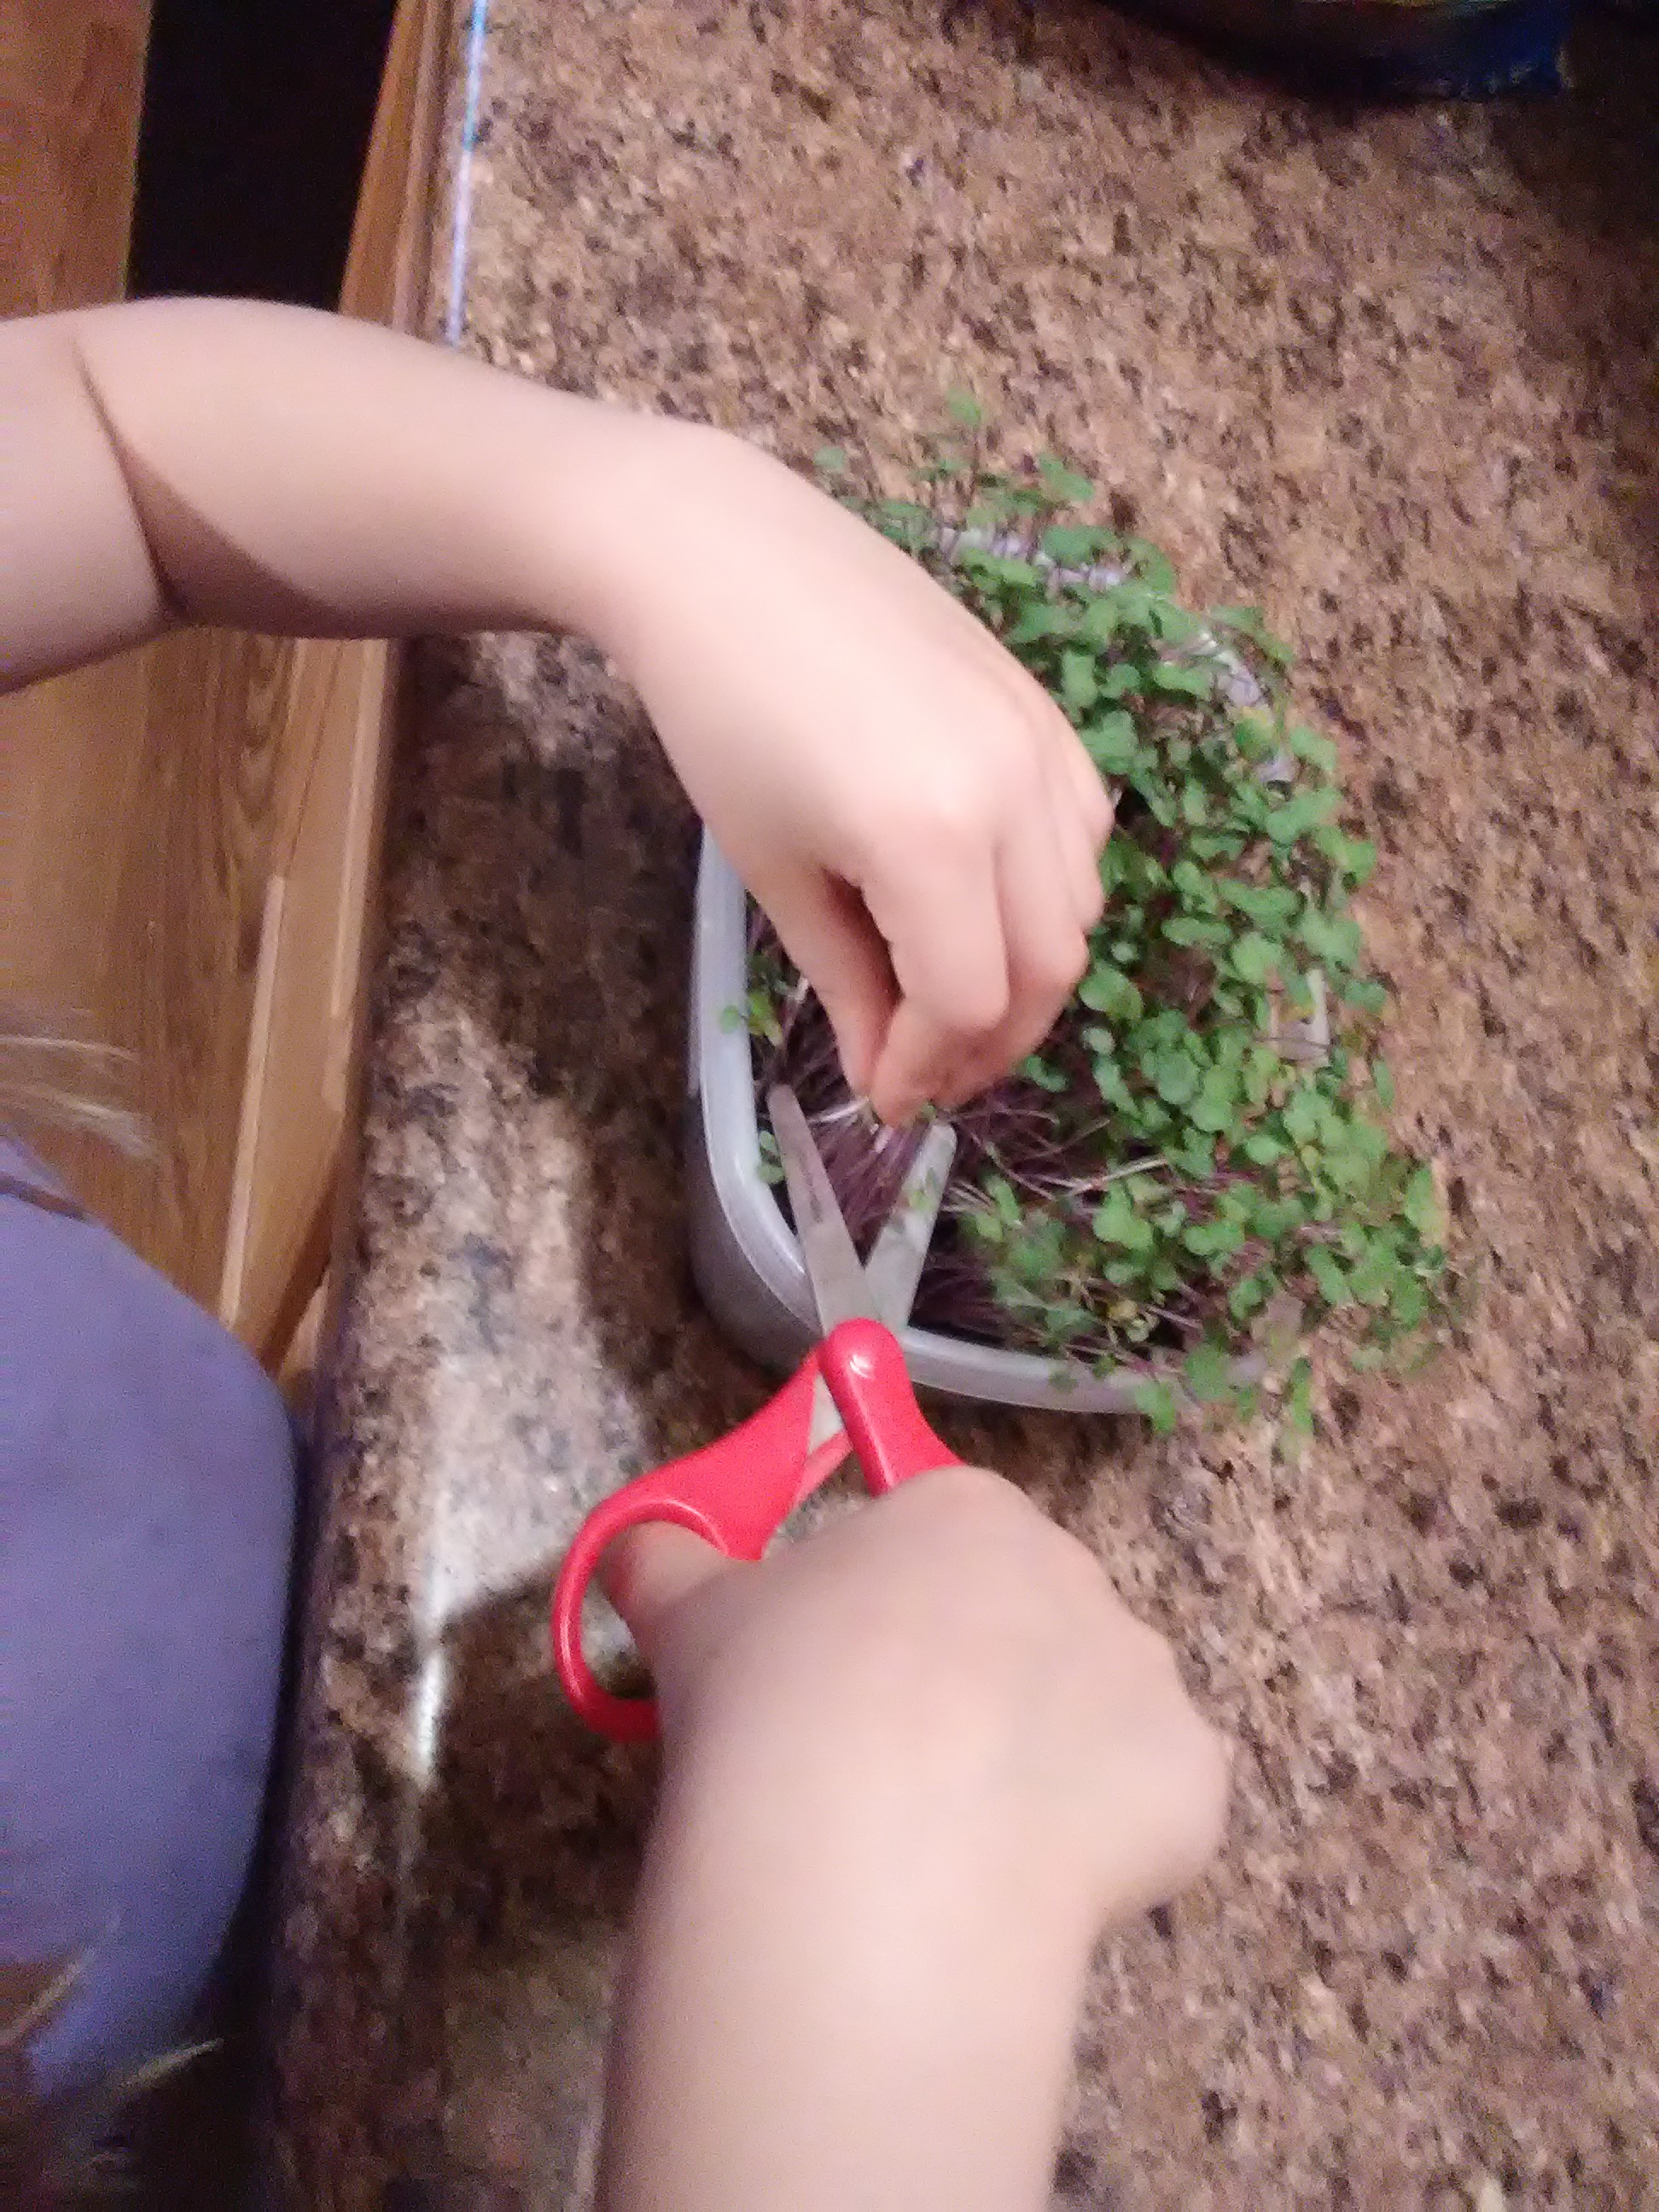
Your microgreens will be ready to harvest in as little as 7 to 21 days, depending on the variety, once they’ve grown to about 2 inches tall and developed their first set of true leaves. At this stage, they’re tender, flavorful, and packed with nutrients—perfect for cutting just above the soil line with a clean pair of scissors. Harvesting is quick and satisfying, especially when you see the dense patch of greens you’ve nurtured from seed.
Once the microgreens are ready to harvest, use your scissors to snip the greens off just above the soil line. Try to leave the younger greens so they can keep growing for harvesting later. Soak the microgreens in a bowl of cool water for about 5 minutes, stirring a few times. Drain them and move to a paper towel, or use a salad spinner to spin them dry. Our 7 year old daughter had fun cutting and gathering the microgreens!
What to Do with Your Harvest: Microgreens in the Kitchen

Once you’ve harvested your homegrown greens, the fun really begins! Microgreens aren’t just nutritious—they’re incredibly versatile and easy to use in everyday meals. Here’s how to make the most of your harvest:
- Add them to smoothies for a nutrient boost with minimal prep. Mild greens like kale, spinach, and beet microgreens blend well with fruit.
- Layer them on sandwiches and wraps in place of lettuce for extra flavor and a fresh crunch.
- Sprinkle them over soups, salads, and pasta to brighten up the dish and add a tender bite.
- Top pizzas, omelettes, grilled meats, and curries with microgreens right before serving to enhance both taste and presentation.
- Toss them into vinaigrettes, sauces, or dips to add freshness and color without overpowering the flavor.
- Use them in juicing recipes for an easy way to concentrate nutrients alongside fruits and veggies.
- Garnish seafood dishes with microgreens like dill, parsley, or cilantro for a delicate, restaurant-quality finish.
When you grow microgreens indoors, you’ll always have a fresh, flavorful garnish at your fingertips. They’re easy to rinse, quick to prepare, and perfect for elevating any meal—from simple snacks to elegant entrées.
Shop Heirloom Microgreen Seeds and Grow Fresh at Home
Choose your heirloom microgreens seeds from St. Clare’s carefully selected collection today and start reaping the many benefits of growing your own food at home. When you grow microgreens indoors, you’ll enjoy a constant supply of fresh, flavorful greens no matter the season—right from your windowsill or kitchen counter. Some of our best-selling microgreen seed varieties include arugula, beets, broccoli, carrots, and kale—all known for their bold flavor, fast growth, and dense nutritional value.
These tiny greens are more than just a garnish—they’re a delicious, nutrient-rich addition to your daily meals and an easy way to boost your health naturally. Whether you’re adding them to smoothies, salads, sandwiches, or soups, microgreens bring vibrant color, fresh taste, and real vitality to the plate. Get started today and discover just how rewarding it can be to grow microgreens indoors with heirloom seeds you can trust. Enjoy every bite!
Click Here to Purchase Microgreen Seeds!
If you have any suggestions or ideas for planting microgreens of your own, please leave a comment below, we would love to hear from you! If you like this article please feel free to share on your favorite social media!
FAQ
What do I need to grow microgreens indoors?
To grow microgreens indoors, you’ll need just a few simple supplies: heirloom microgreen seeds, a fine seed-starting mix, shallow containers (like deli or lunch meat trays), a spray bottle for watering, and a light source such as a sunny windowsill or grow light. Labels and masking tape are also helpful for keeping track of different varieties. With these basic items, you can start growing fresh, nutritious microgreens year-round, even in small spaces like apartments or kitchen counters.
How long does it take to grow microgreens indoors?
Most microgreens are ready to harvest in just 7 to 21 days, depending on the variety and growing conditions. Fast growers like radish and broccoli may be ready in as little as a week, while others like parsley or beets take a bit longer. Because you grow microgreens indoors, temperature and light are easier to control, which helps ensure fast and reliable harvests with minimal effort.
What are the easiest microgreens to grow indoors for beginners?
If you’re just starting out, some of the best microgreens for beginners include arugula, broccoli, kale, mustard, and radish. These varieties germinate quickly, grow evenly, and have bold, appealing flavors. They’re also quite forgiving, making them perfect for anyone new to learning how to grow microgreens indoors without needing a green thumb.
Can I use regular potting soil to grow microgreens indoors?
You can, but it’s not ideal. Regular potting soil tends to be bulky and may contain large chunks of bark or organic matter that hinder delicate seedlings. When you grow microgreens indoors, a fine seed-starting mix is much better. It provides a loose, well-drained, and sterile environment that promotes even germination, strong root development, and healthy growth.
What containers work best for growing microgreens indoors?
You don’t need fancy trays—almost any shallow container 2–3 inches deep will do. Recycled deli containers, takeout boxes, disposable pie tins, or fruit clamshells all work great. The key is to choose containers that allow for good drainage and hold about an inch of soil. When you grow microgreens indoors, using what you already have is both budget-friendly and eco-conscious.
Do I need special equipment to grow microgreens indoors?
No special equipment is required to grow microgreens indoors. Many people start with what they already have at home—recycled containers, soil, seeds, and a bright window. While grow lights, seed mats, or humidity domes can enhance the process, they’re entirely optional. This is one of the reasons microgreens are so accessible and popular—they’re low-cost, low-effort, and high-reward.
How often should I water microgreens?
Water your microgreens once or twice a day by gently misting the soil with a spray bottle. The goal is to keep the top layer consistently moist, especially during germination. Because you grow microgreens indoors, you won’t have to worry about rain or drying winds, but indoor air can still dry out soil quickly—so check moisture daily to keep your greens healthy and thriving.
When is the best time to harvest microgreens?
The best time to harvest is when the microgreens reach about 2 inches tall and have developed their first true leaves, which typically takes 1 to 3 weeks. Use clean scissors to snip just above the soil line. If you’re careful, you may be able to harvest in stages, leaving younger greens to continue growing. This flexible harvest window is one of the many perks of choosing to grow microgreens indoors.
Can children help grow microgreens?
Absolutely! Growing microgreens indoors is a fun and educational activity for kids. It teaches them where food comes from, gives them hands-on experience in planting and caring for something, and encourages healthy eating. The fast growth and visible results keep them engaged—and since the process is simple and mess-free, it’s perfect for doing together as a family.
How can I use harvested microgreens in my meals?
Microgreens grown indoors are incredibly versatile. You can sprinkle them on top of soups, salads, sandwiches, pasta, omelets, or even smoothies. Their fresh taste and vibrant color enhance everything from everyday meals to gourmet dishes. Best of all, when you grow microgreens indoors, you always have a living supply of flavor and nutrition right at your fingertips—no store trip required.


After you harvest your greens, do they grow again? Do you pull up the roots and replant?
+
J.M.J.
HI Patty,
Microgreens are typically not regrown after the initial harvest. The only microgreens that you can regrow is Pea, with special care(instructions available in webs searches) and you can regrow it only once.
No, it’s generally not recommended to plant new seeds in the same soil immediately after harvesting microgreens; it’s best to start fresh with new soil each time because the old soil can harbor pests and diseases from the previous roots and stems, and is more likely to develop mold or fungus issues; instead, it is recommended to compost the used soil after harvesting and use fresh soil for the next batch of microgreens.
We hop this helps!
God bless,
John, Sarah and Family
Exactly the information I was looking for.
This is very educational I love gardening. Now on I will try on the deck in the pots because of deers population in my area. Your photos and instructions are amazing.
Thank you so much
This is amazing! I am not a gardener but want to give it a try, and this is a perfect way to start. Your instructions and photos are both educational and precious. Thank you
Your website is beautiful and inspiring. Information and inspiration for container gardening is requested. I have a small deck facing southeast in a townhouse. Hoping to start a small garden from seed this spring. Have had lots of success with potted flowers each spring/summer season – geraniums especially. Thank you!